eInk Spectra build guide

I've just released a new video build guide, which covers the FrameOS case maker, and the new full color e-ink Spectra lineup from both Waveshare and Pimoroni.
Intro
What follows is the video transcript.
To make a frame like this you'll need four things: the panel, the controller, the case and the software.
In this video I'm going to going to cover all four, and then we'll build a few sample frames together.
Panel
First the panel.
Where I live I have easy access to e-ink panels from two manufacturers: Pimoroni in the UK and Waveshare in China... I can buy directly from them, or from their numerous resellers on Amazon.
Waveshare makes many different panels, most imporantly their latest 6-color e-ink spectra lineup, available in three different sizes. their panels are basically pure glass, and come with a separate little board that you attach to your controller, either through the 40 pin interface, or with the included cables.
Pimoroni's panels also use the e-ink spectra technology, but packaged differently. The panel is glued to a thick PCB, with all the chips on the other side. This makes it much stronger, but also thicker and with larger bezels. The 40pin connector is soldered onto the board, and they also included four clicky buttons for fun and profit. We'll make use of those later.
Controller
Next, the controller.
Technically you could go with a microcontroller such as the ESP32. Those chips are powerful enough to download an image from the internet, and show it on the screen. sadly that's about all they can do. with just 16MB of storage and around half a megabyte of RAM, you're very limited to what you can do on device. your frame effectively becomes a dumb terminal, dependent on a web server to show anything.
That can be a good thing - if someone steals your frame, you can remotely disable it, and they won't have more than the last image on the screen.
I, however went with something else: the Rapberry Pi Zero W2.
With half a gigabyte of RAM and four 64bit ARM Cortex-A53 cores clocked at 1GHz, it's a beast, relatively speaking. it's comparable to a budget Android smartphone from 2014. That means it can store a lot more data, and we can run everything locally on device.
The downside is that it consumes a lot more power: a full watt when idling, so you won't be powering it with a battery. that was never my plan, as batteries are annoying, even if only have to change them once per month.
Case
Third, the case.
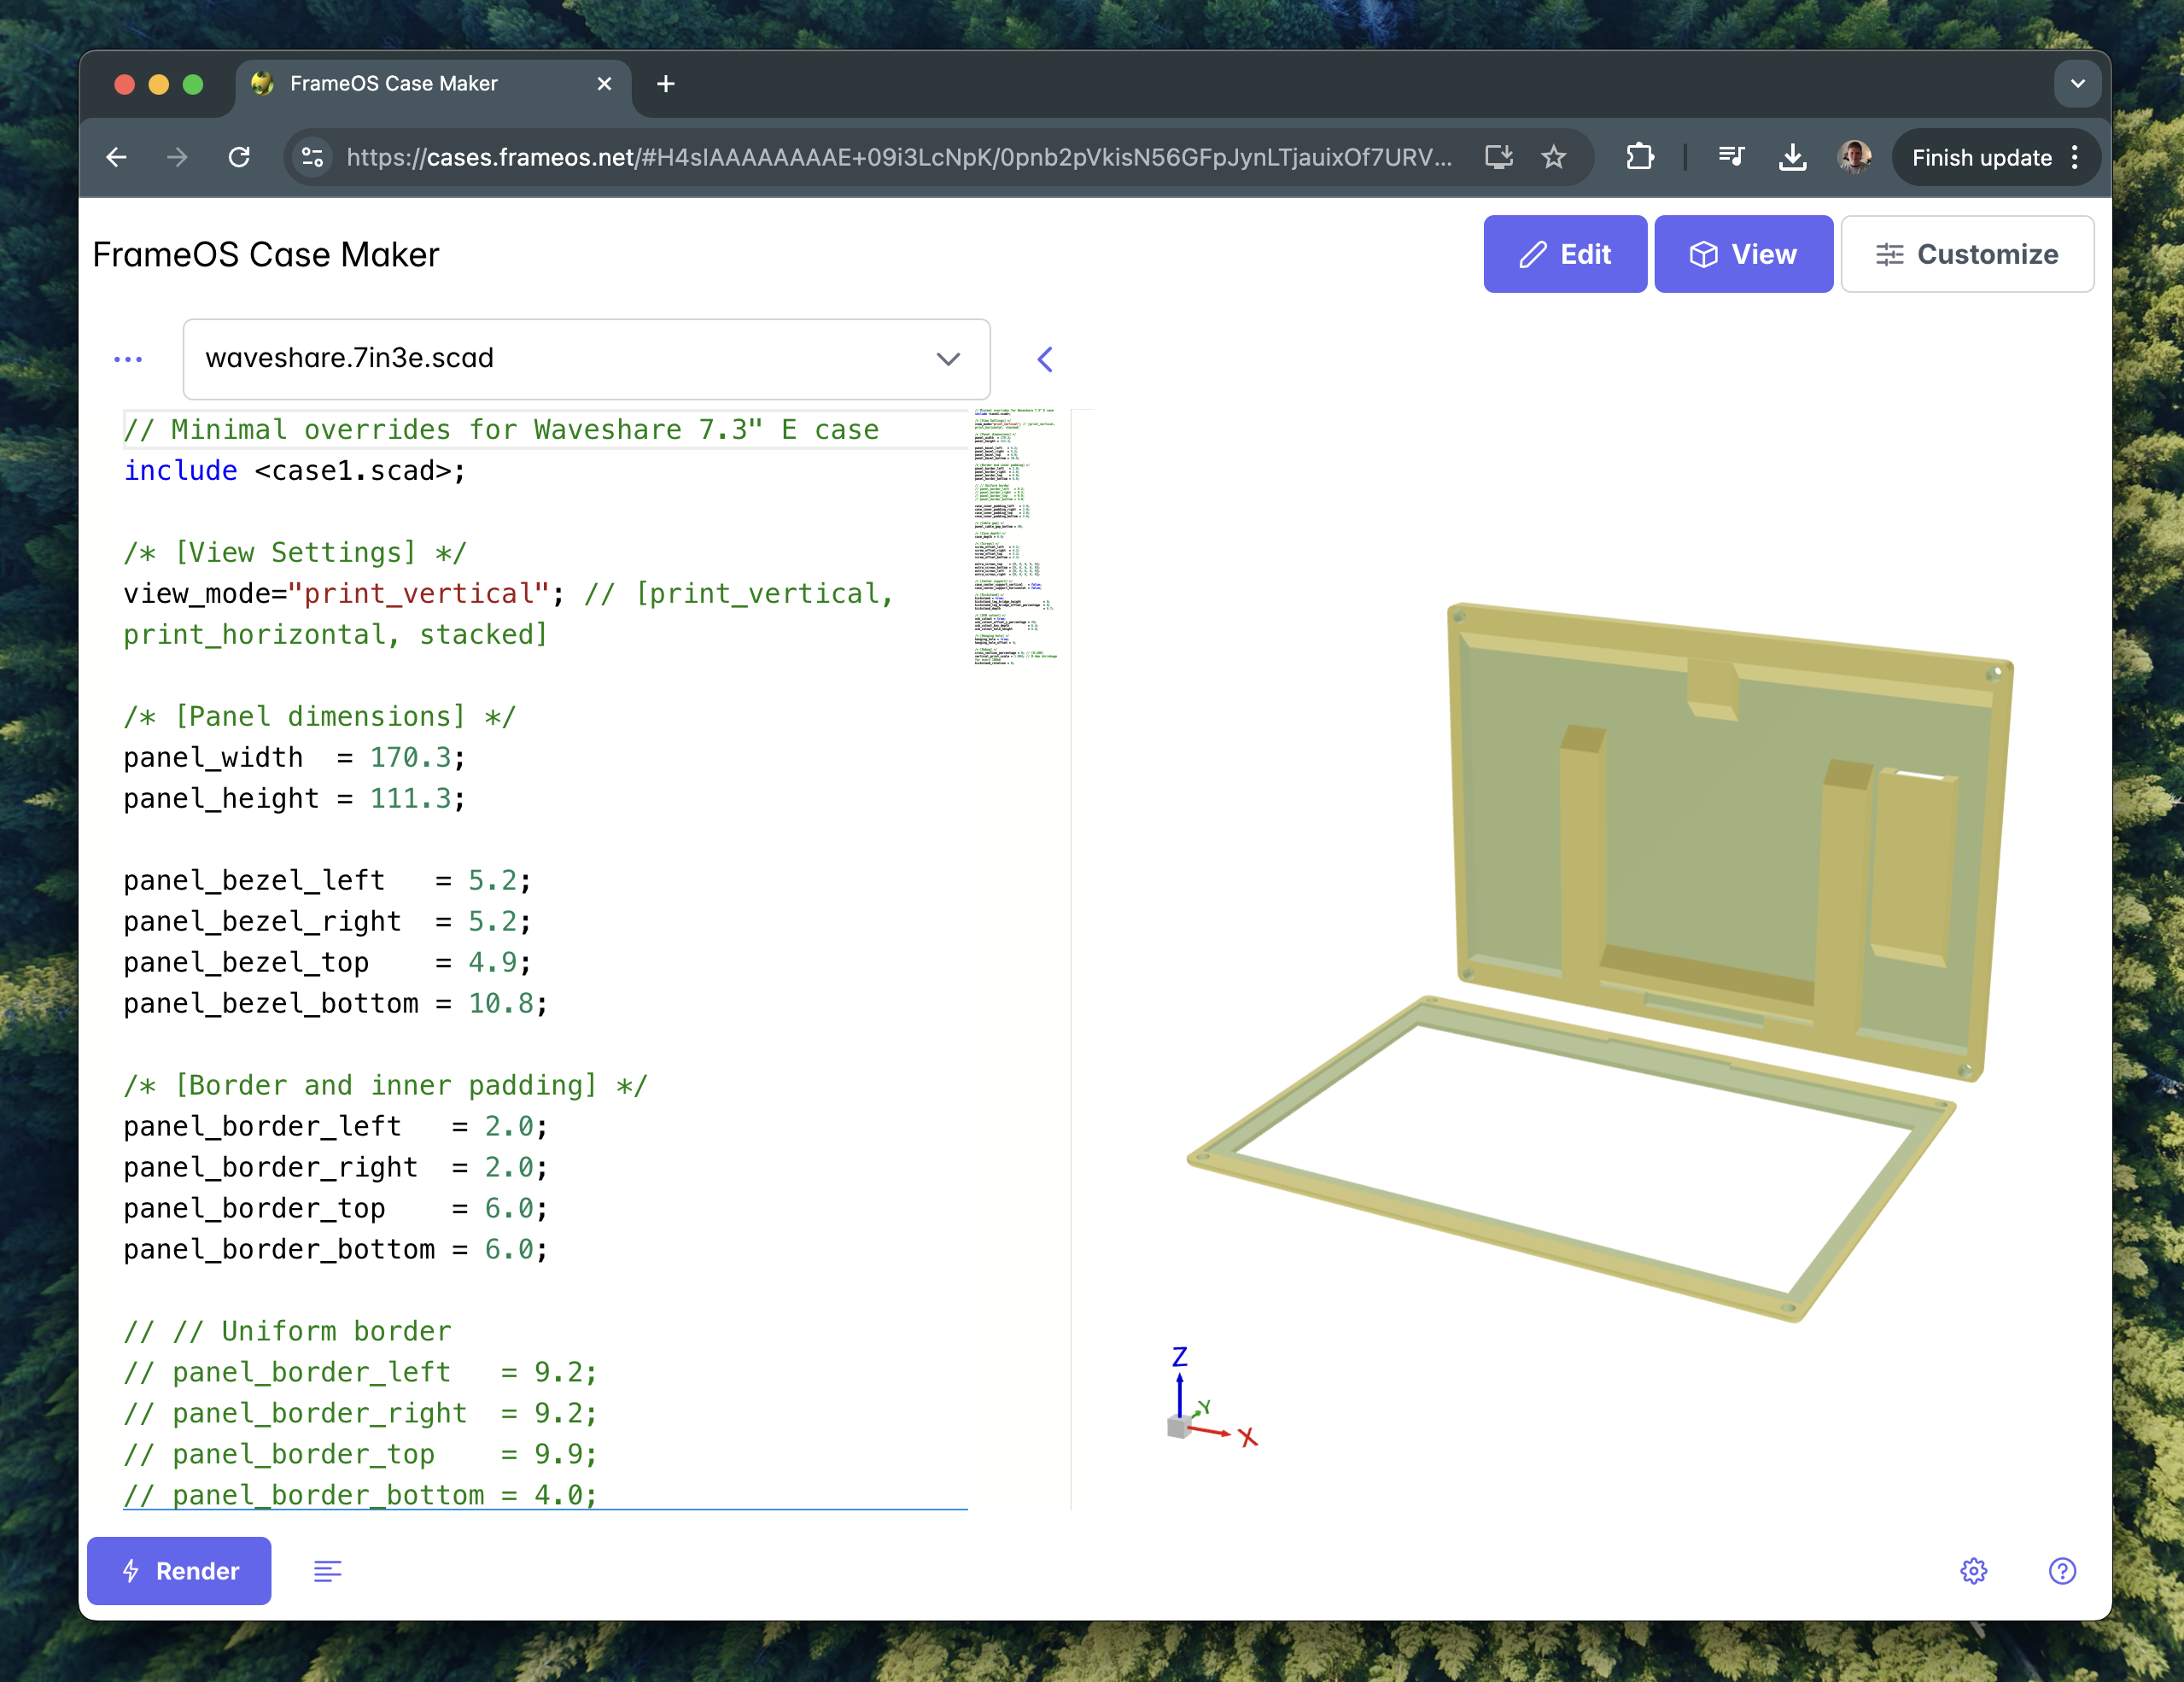
Tired of redesigning the same thing over and over again, I learned OpenSCAD and built a tool simply called "The Case Maker". It lets you customize and print out a case for your frame. Choose a template to get started, and modify the parameters to fit your needs. Once done, hit render, download the STL and print away. You'll also need a few 6mm M2 screws, and as many M2x4x3.5 heat set inserts.
The most important parameter to configure in the case maker is the case depth. This determines how much space is left inside for your electronics. The smallest I've gone is 6mm with Waveshare panels. This gives a total thickness of just 1cm, but requires a lot of soldering. You can probably get away with a 9mm case depth if you're using a right angled gpio headers, but even that is not guaranteed, so always measure your components.
For the easiest setup you'll want a Pimoroni panel and a case with a 12mm depth to fit the attached raspberry. For the slimmest setup you'll want a Waveshare panel with a 6mm case depth and a lot of janky soldering. It all depends on your skill level, and how much time you want to put into it.
There are a few other features in the case maker:
- You can of course modify the various dimensions
- You can add or remove screws as needed.
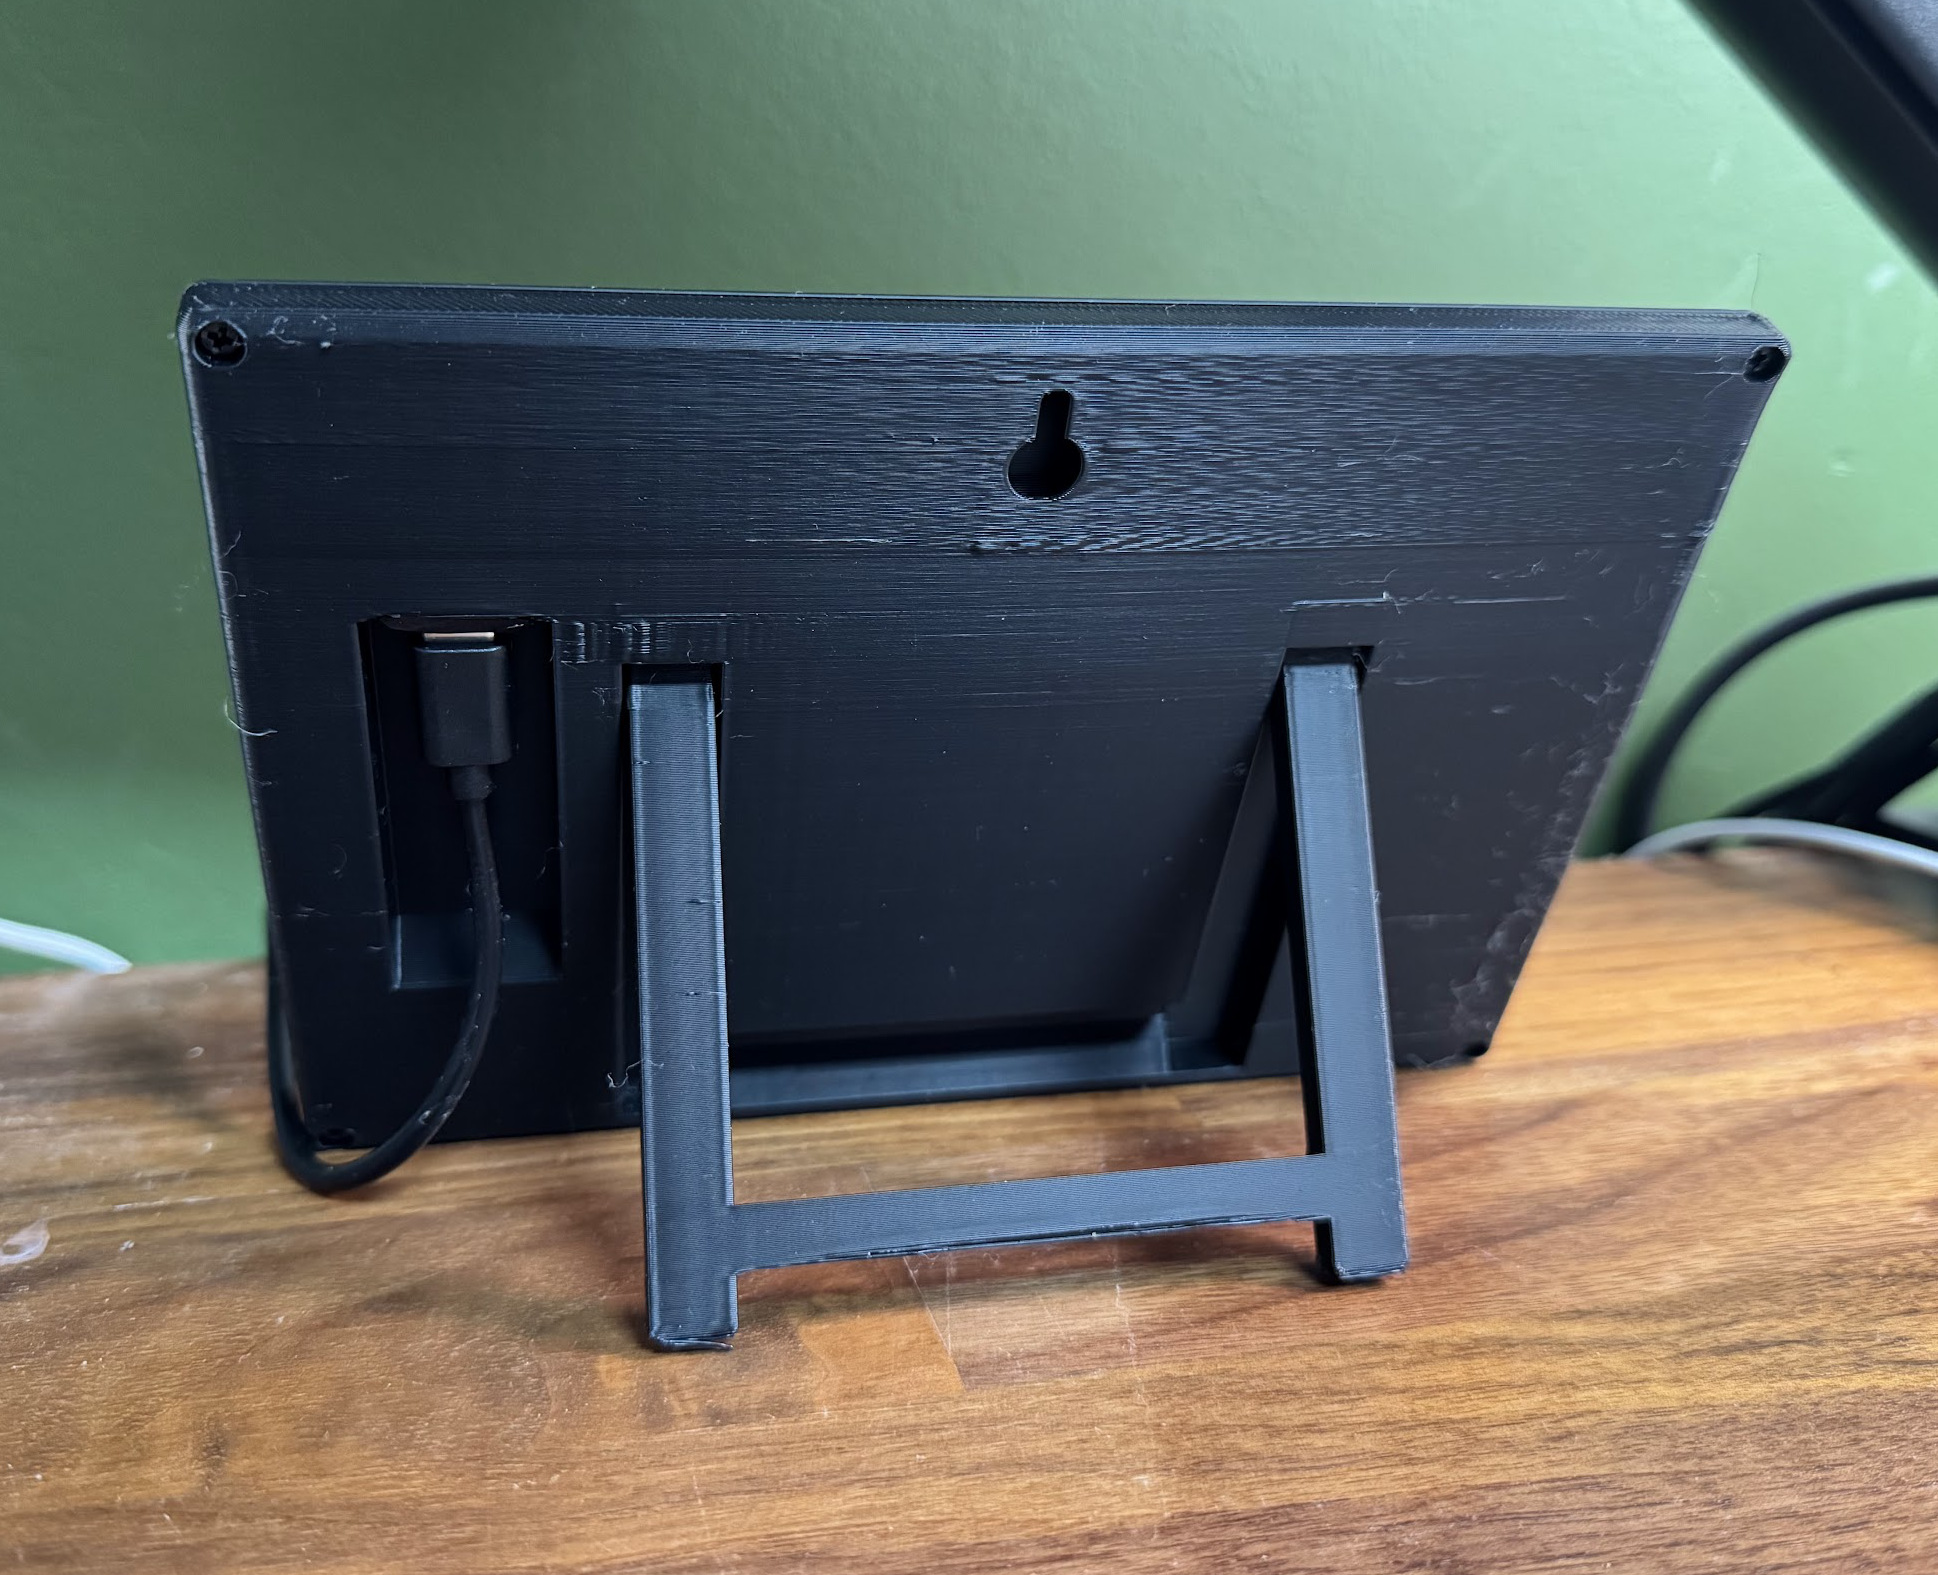
- You can add a print-in-place kickstand
- You can add a USB cutout
- You can add various holes for hanging it on the wall
- You can place an SD card adapter in either the kickstand's leg or in the USB cutout, more on that later
- You can add pins to hold your raspberry in place, complete with cooling holes
- You can add even more cooling holes elsewhere on the back
- You can add as many side buttons as you want.
... and you can print all of this both vertically and horizontally, so for those of you Bambu Lab users complaining that you can't print a case for a 13" frame with your X1C... well, yes, yes you can. Just print it upright. It may warp and require some post processing, but it's doable.
If I have one tip here it's this: print the cover of the case first, and then print the rest. Make sure your expensive piece of glass fits perfectly in there. If not, adjust the dimensions and try again. This one tip could save you a lot of money, as it's very easy to break these panels.
Software
Finally, let's talk software.
I will of course be using FrameOS, which is an open source project I built specifically for controlling e-ink displays around my house.
The first step is to install the FrameOS backend, which is usually done via docker. You use the backend to deploy software onto the frames via SSH. Once a frame is connected - and more on this in a bit - you can choose from any of these ready made scenes, and then hit "deploy".
FrameOS is built in Nim, a compiled language. That means it's fast to run, but it takes time to deploy. We'll now compile all these scenes into a binary, and then run that on the frame.
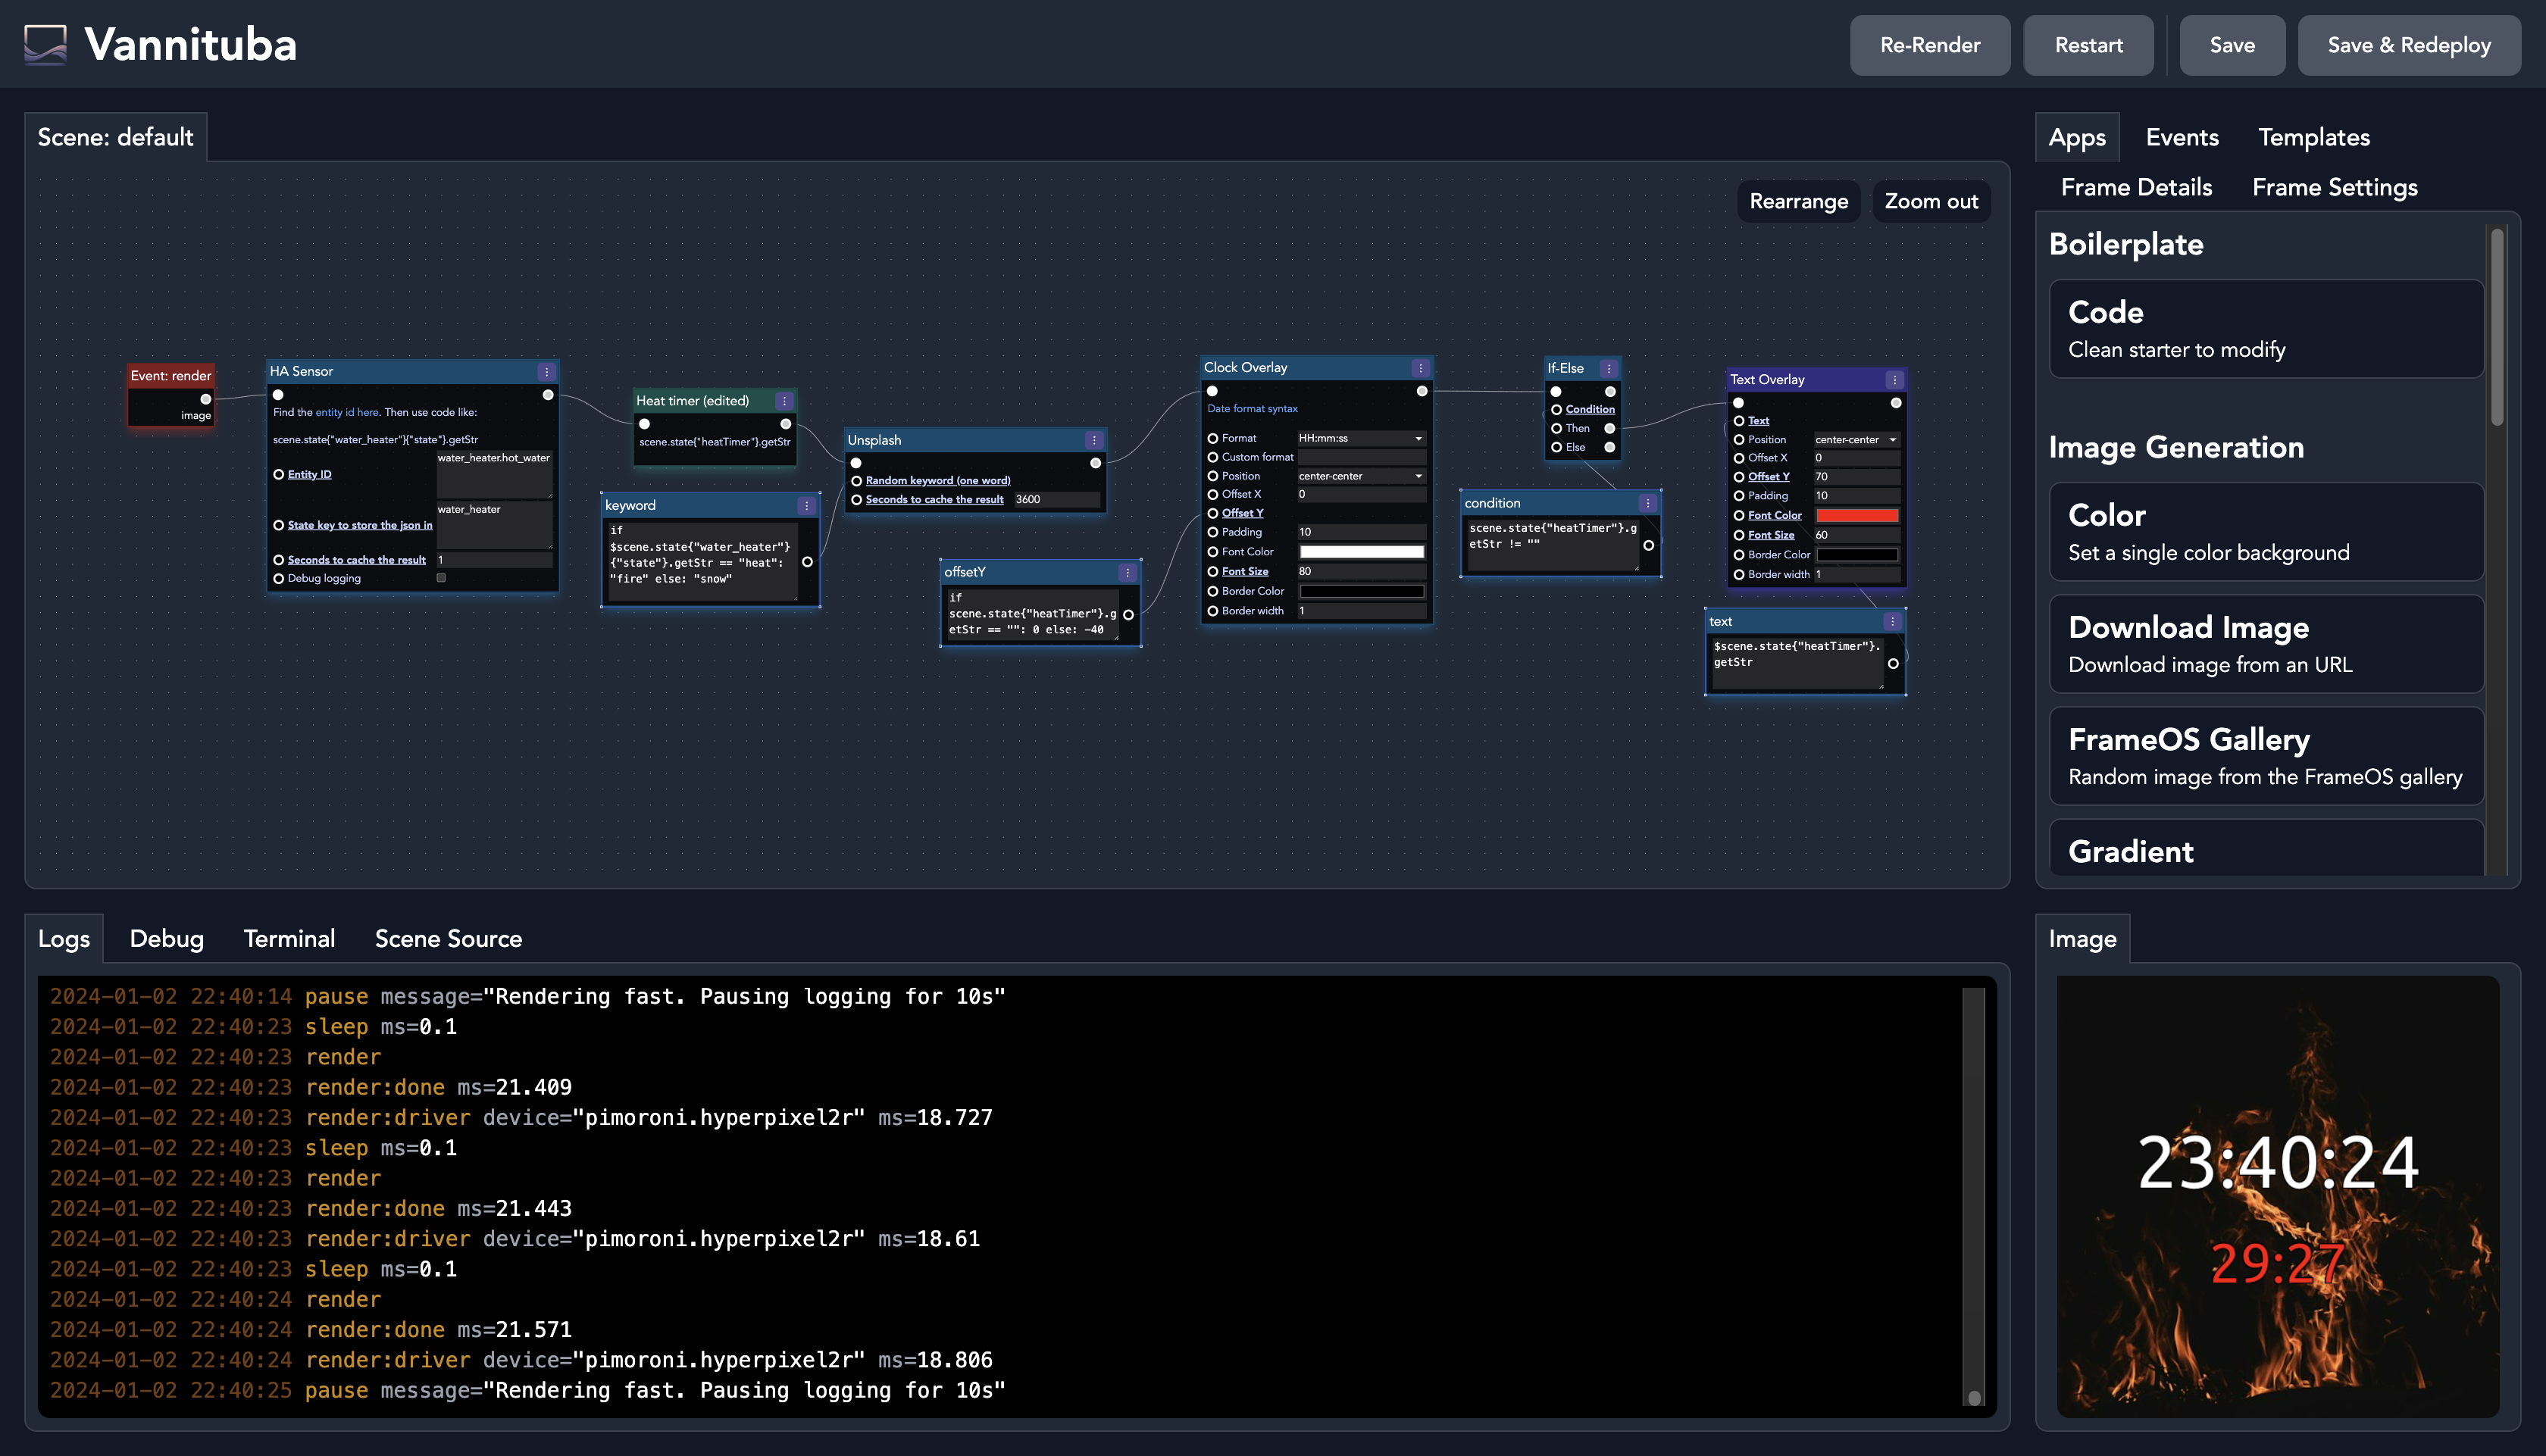
When you need something more complex than the included scenes, click "edit" and study how these scenes are built. There's always a "render" event that kicks off the whole thing, triggered at an interval. Then the blue "logic" nodes are executed, in the order that they're connected. Green "data nodes" fetch, transform or generate data, and also handle caching. Yellow "state nodes" are user provided input. Logic flows from left to right, data flows down. Pull from a handle to connect it to another handle, or to create a new node. You can also write quick nim code in code nodes with arguments, and you can edit the source behind whole apps. Save and check the "scene source" tab for syntax errors. When you're done, deploy your changes to the frame. If you run into issues, post on Github or ask the community on Discord for help.
Once a frame has been deployed, you can shut off the backend, though it's useful to keep it up and running to collect logs and other system metrics.
SD card
Next, let's set up the SD card.
If you haven't already, install the FrameOS backend. You can install it as a Home Assistant addon, or run it directly with docker. Either copy the oneliner, or run the various docker commands manually.
bash <(curl -fsSL https://frameos.net/install.sh)
Once up, sign up, go to settings and generate a new SSH key. copy the public key and save the changes.
Plug in your SD card and open the raspberry pi imager. Choose the latest 64 bit Raspberry Pi OS Lite version, select your sd card and then edit the customization settings.
Type in a hostname, enable SSH and paste in the public key you just genereated. Save it all and hit write.
Building the 13.3" Waveshare Spectra frame
Finally we're ready to build some frames
wWe'll start with this 13.3" panel from waveshare on medium difficulty.
Before we make any hardware modifications, let's verify that we can get something to render as is. To speed things up, I'm using a full Raspberry Pi 5 here. Attach the control board and the SD card, and power it on.
Go back to the FrameOS backend and add a new frame. Use the same hostname dot local you set earlier, and choose the right driver for your panel. In this case it's the waveshare 13.3"E 6-color spectra panel.
Now, install a few included scenes, and hit deploy.
If you're lucky, an image will appear on screen after a few minutes. If it's rotated, click "settings" and choose "rotation" - "90 degrees". Then redeploy.
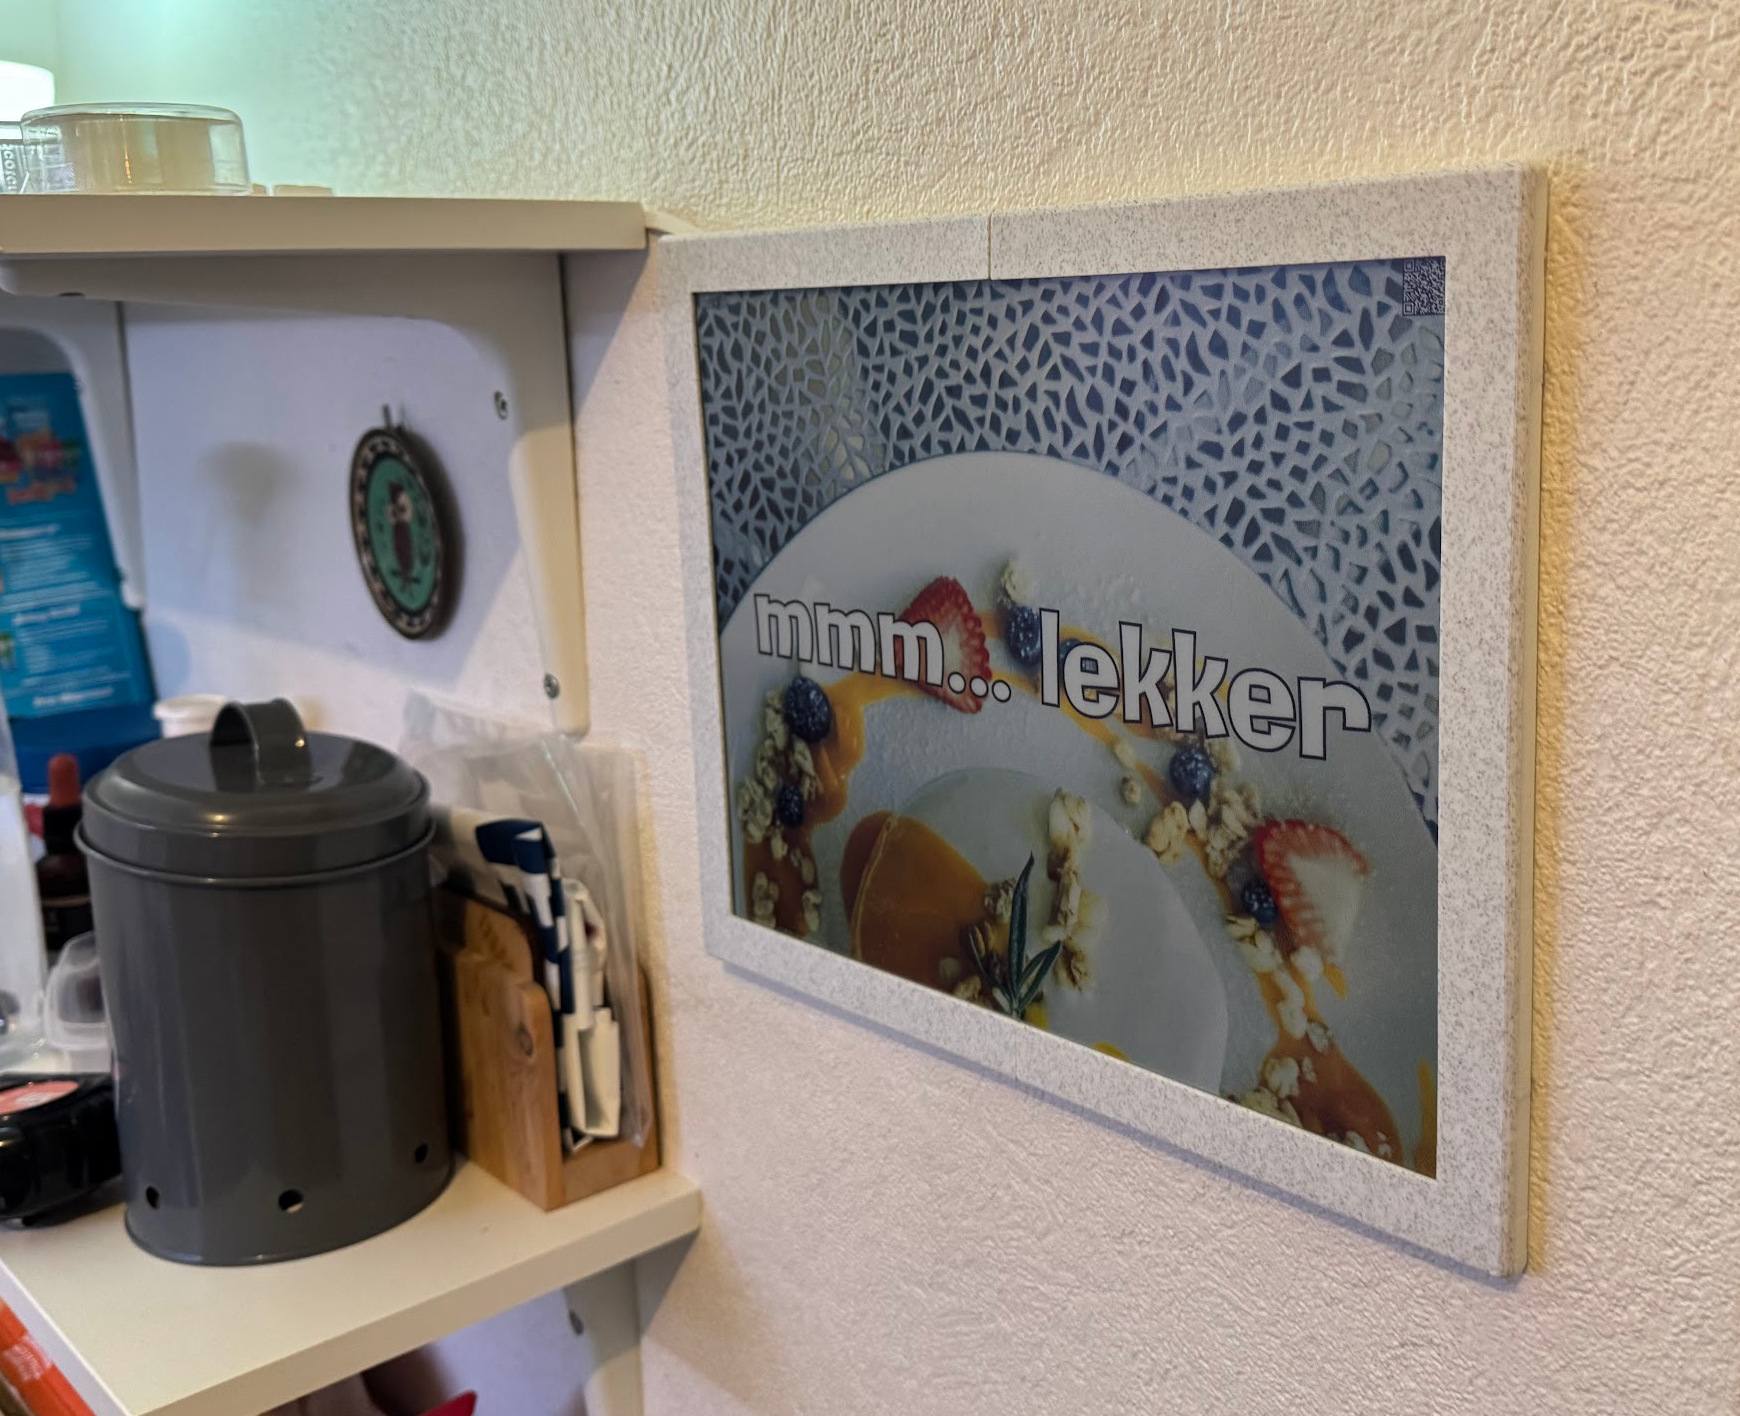
You might be wondering what is this QR code. Well, it's something you can use to control the frame directly from the local network. You can disable it under settings if you don't need it.
Now let's switch from a bulky Pi 5 to a Zero W2.
Measuring things, the control board is the thickest piece at 9mm. a pi zero with right angled gpio headers less than that, making our final case depth 9mm.
Open the case maker, select the 13.3" waveshare case, and make sure the depth is at 9mm. as for the other options, we're going to add a USB charging port, and a SD card adapter to the left of it. we'll also add a thick border, as it gives the frame a more classic appearance.
Solder on the gpio header, and attach the wires according to the schematic from waveshare's wiki. plug it in and make sure everything still works.
Great success!
Now to power it, you could just plug a USB cable through the hole, attach the wires, and call it a day. However since we want a professional look, I'm going to use one of these female USB C connetors I found on Amazon. Solder on two cables, and connect them to your raspberry's 5v and ground pins as indicated.
To hold it in place, I'm going to use a bit of superglue. Use as little as possible, as it's very easy to get some in the port and get a cable permanently stuck there. An even better option than superglue is to use a 5 minute epoxy.
Sadly our USB C port will only work with a USB A to C cable, but that'll do for now. If you want to get true USB C to C power delivery to work, you'll need to solder a small 5.1kohm resistor between these two pads here. I tried and failed, so I guess this will have to do.
SD card
Finally, the SD card adapter. This part is strictly optional and quite hard to pull off. We'll be using one of those micro SD card adapters to extend the SD card slot, and make it easy to swap cards without opening up the case.
Cut out 8 identically sized cables, and then follow these schematics to wire them all together. Pretin the pins on both the raspberry and the adapter, and then do your best to not leave a mess. I'm using 24 gauge wires here.
The SD card is still a high speed bus, so it's very easy to mess something up and have it not work. tread with caution. I have about a 50% success rate here.
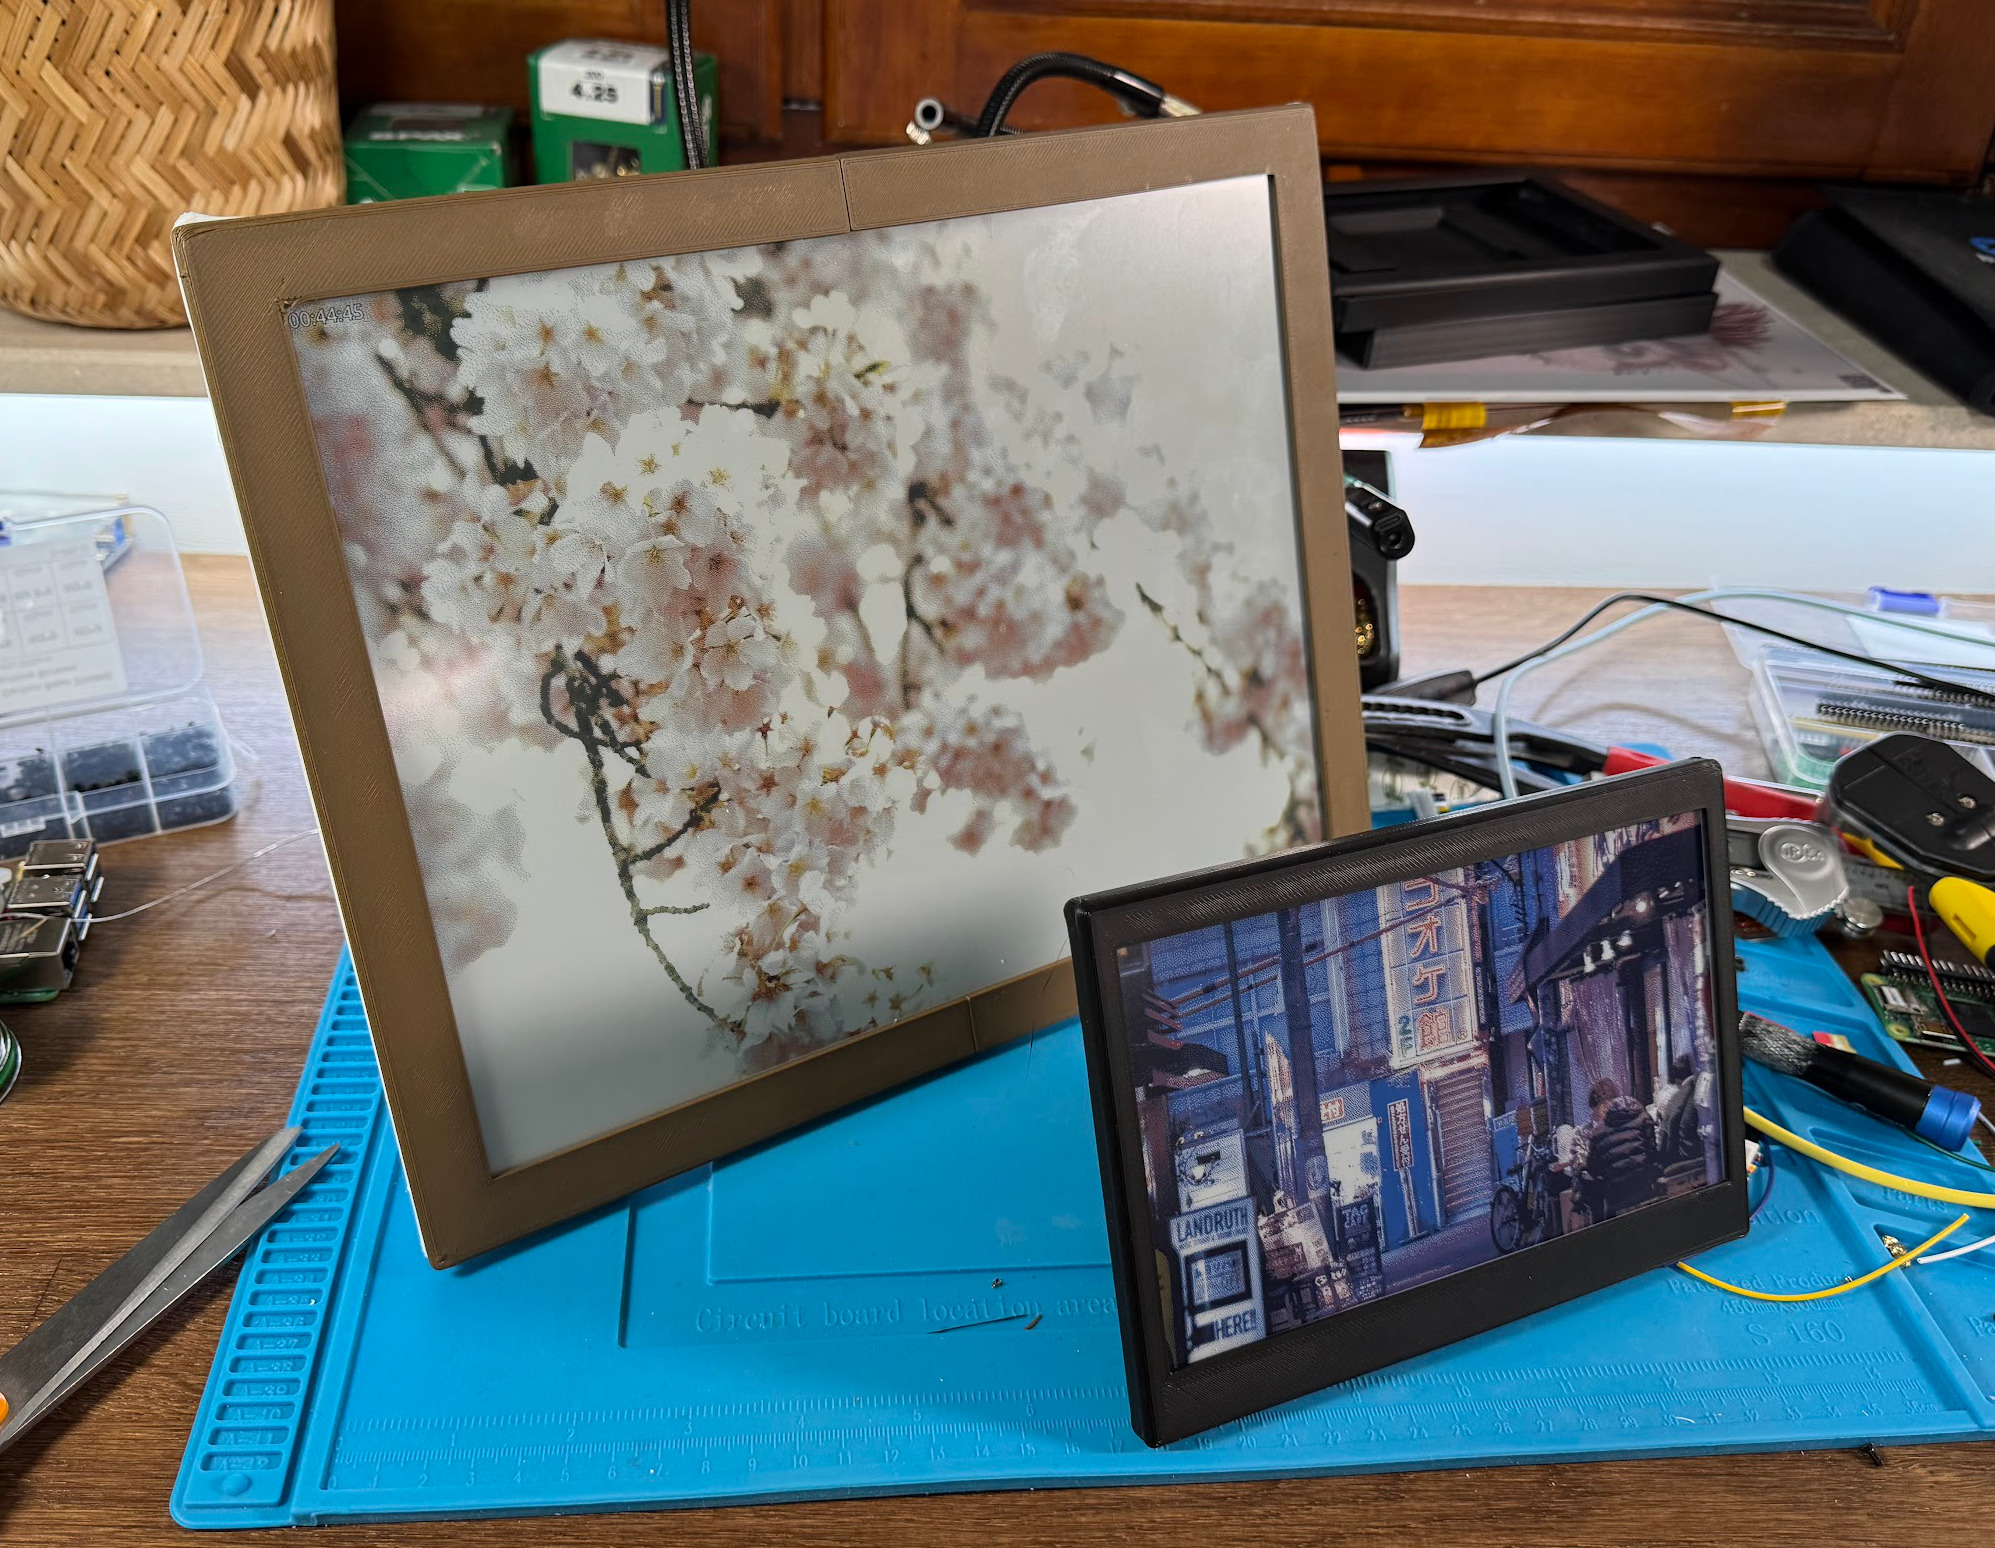
And there you have it, a gorgeous looking home made 13.3" full color e-ink picture frame.
Attach the heat set inserts to the frame's cover, and screw them in from the back. stop screwing when you encounter resistence --> too much and you'll either rip off the inserts, or punch through the plastic cover itself.
Buliding the 7.3" waveshare frame
Building a frame with the 7.3" waveshare panel is very similar. The one exception is that the control board is much thicker, at around 11mm this time. if you want to keep it as is, you'll need a bulkier case. we'll still use the right angled GPIO headers, and we'll skip the SD card adapter this time
We'll also add a print in place kickstand.
The installation process if very similar. follow the wiring diagram to connect the right cables to the right headers, add a USB charging port as described earlier, and you're good to go.
Unfortunately here I messed up the superglue, and got my USB cable stuck in the port. So I'm just going to hardwire the cable directly to the pi.
And there you have it. It's bulky and could use a better set of colors, but it works!
The slim 7.3" version is pretty similar, with a few key differences. First the control board. How do we slim it down? Our target is a 6mm case depth, as then the entire frame will be just 1cm in depth.
Somehow we're going to need to slim the control board down from 11mm to just 6. Looking at it, we have two things we can remove: the 40pin gpio connector, or the 8 pin connector on the other side. Removing the GPIO connector is hard. It's very easy to pull off copper from the PCB itself, rendering the entire thing useless. It also won't give us the clearance we need.
So instead, we'll be pulling off this other connector, and wiring the cables directly to the exposed pads. Next, instead of using a GPIO header on the raspberry, we'll solder the cables directly onto it.
We'll also add a GPIO button this time. figure out which pins on the button itself are "default off" or no contact, and solder them between the ground pin and a free GPIO port. I recommend GPIO 5 to start. we'll also add the USB C port as before, and use superglue to hold it all in place.
Close it up... and enjoy!
The Pimoroni panels
Finally, let's look at these two panels from Pimoroni.
They're a bit bigger than the ones from waveshare, but like I said earlier, they're much stronger as a result. You won't really notice the extra size in real life.
For the easiest build, choose the 12mm pimoroni case templates. Print it out, attach the panel and the raspberry, and you're basically done. You still need to power it, so either add a USB port like we did earlier, or then stick a cable through the hole and hook it up directly... and that's it.
Set up your frame with the right driver, and it should register the 4 gpio buttons automatically.
Now, you can still slim these builds, if you print a 6mm case, ditch the 40pin connector, and hardwire the raspberry directly onto those exposed connectors. Look at pimoroni's schematics or just use a tester to know which pin goes where... and don't forget about these four extra pins for the buttons.
It's a bit more work, the result might just be worth it. So good luck!
Outro
And there you have it.
There's a lot more we could cover, but those are the basic steps if you want to build a frame like this yourself.
Good luck, have fun, and I'll catch you all next time.
Join the community on discord, and have a great one!