
 FrameOS
Editing apps
Every node on a scene is an app you can fork and edit - in JavaScript, or in Nim.
Every blue and green node on a scene is an app: a small program with typed config fields, an optional image output, and access to the scene's state. FrameOS ships with ~40 built-in apps, and you can edit or write your own.
What's in the box, roughly:
- Data: clocks, iCal calendars and agendas, weather, Home Assistant sensors, waste-collection schedules, JSON/XML parsing, HTTP downloads.
- Images: photo galleries, Unsplash, Wikimedia Commons, Immich, Google Photos, images from any URL, files off the frame's own SD card, OpenAI image generation, RTSP camera snapshots, headless Chromium screenshots.
- Render: text, QR codes, calendars, charts, SVG, gradients and color fills, opacity, split layouts, zoom/pan (Ken Burns), resize and rotate.
- Logic: if/else, set state, log, sleep control.
Self-hosted backend, FrameOS Cloud and standalone frames
JavaScript apps can be written and edited in the self-hosted backend, in FrameOS Cloud and on a standalone frame's admin page alike. Custom Nim apps and Nim code nodes need a compiled scene, which only the self-hosted backend can build - the cloud never compiles code. That path is legacy: convert such scenes to JavaScript where you can.
Edit any app
Click the edit button next to any app on a scene to open its source. JavaScript apps are editable everywhere, the scene store's editor included - saved changes are forked onto that scene, leaving the original untouched. The built-in apps are compiled Nim, so in an interpreted scene their source opens read only, with an Open in GitHub link; to customize one, write a JavaScript app or an inline code node instead. In a legacy compiled scene on a Raspberry Pi, a scene-local Nim app still opens for editing, under a notice offering to convert the scene to interpreted.
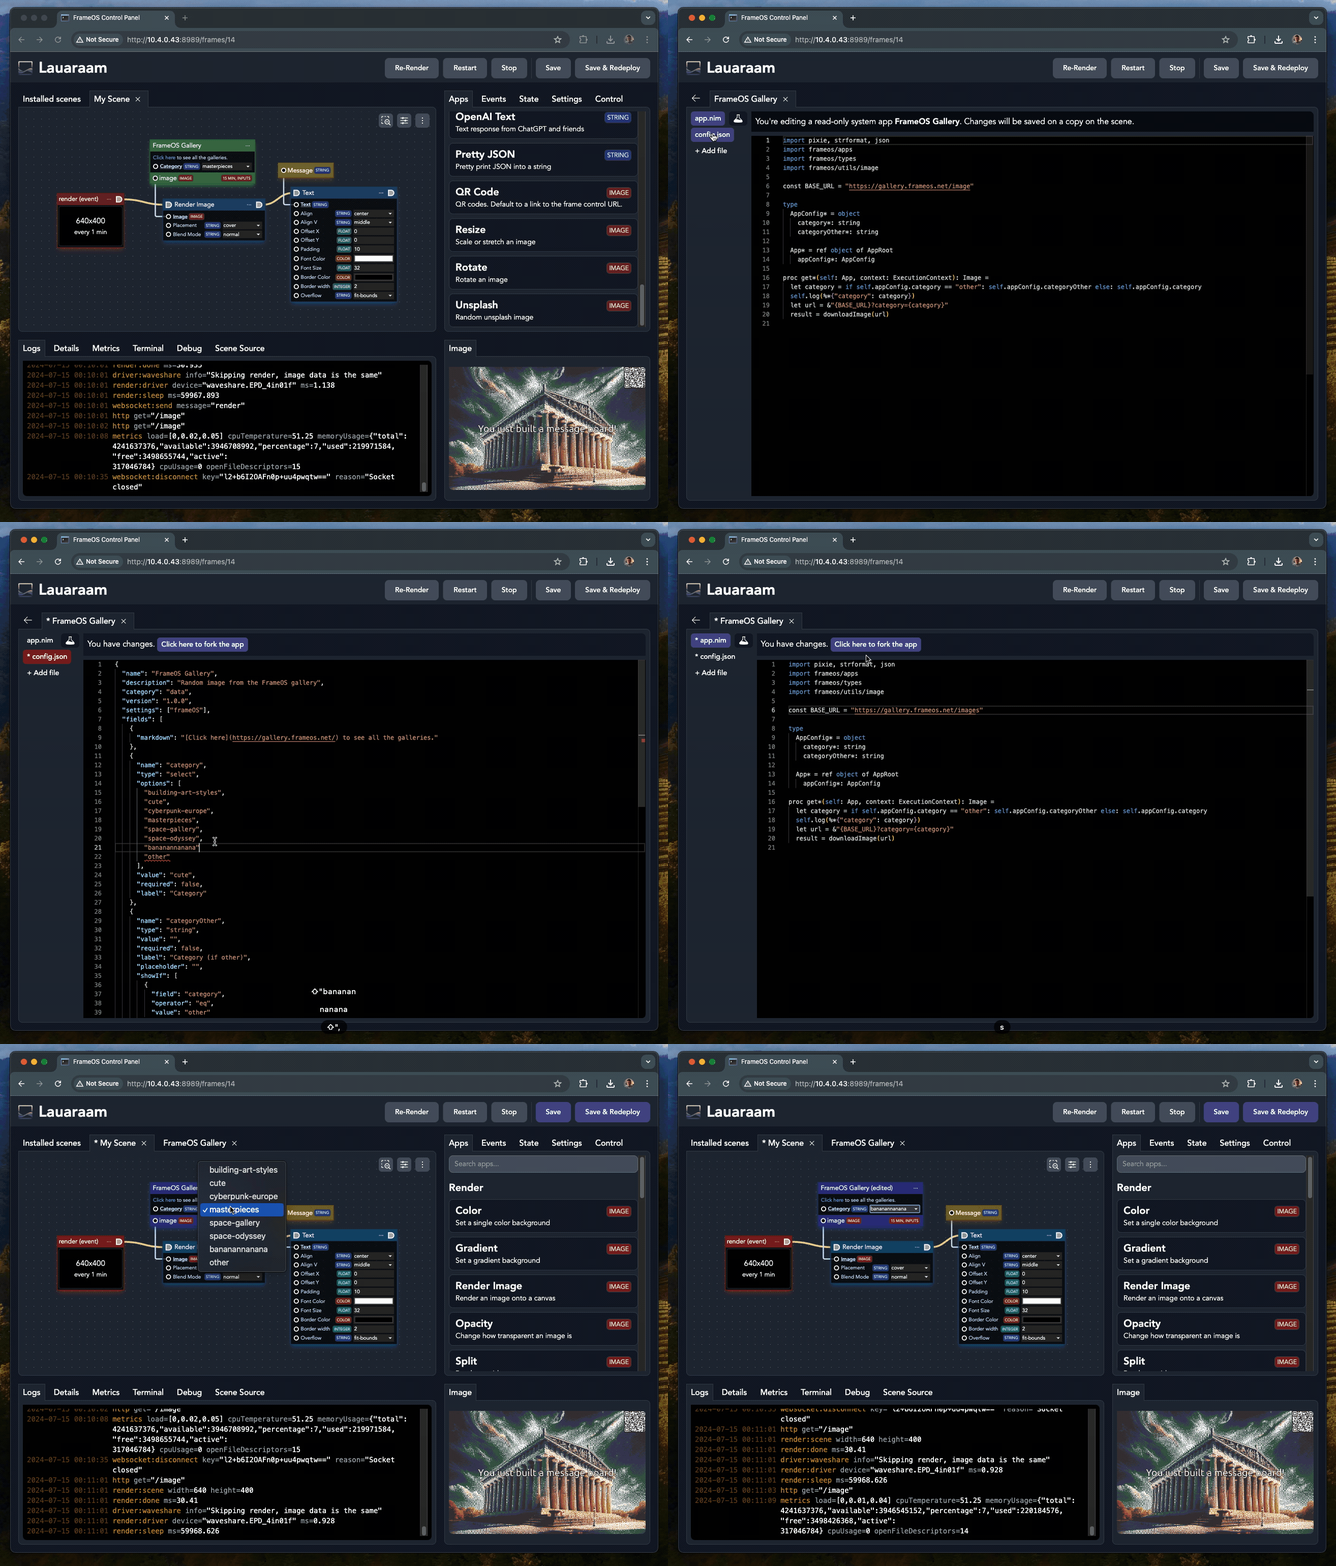
Apps run with full access on the frame. Read the source before installing scenes or apps from strangers.
JavaScript apps
This is the normal way to write an app. They run on the frame inside an embedded
QuickJS runtime - FrameOS's own fork,
quickts, which parses TypeScript and JSX natively (2026.9.0+),
so errors name your own file and line. No Node.js needed on the device, and no
compiler, so your change is live on the frame seconds after you save it. Create one from the code
templates (text, logic, SVG, or image), define its fields in config.json, and export plain
functions:
export function init(app: FrameOSApp): void {
  app.initialized = true
}

export function get(app: FrameOSApp, context: FrameOSContext): string {
  return `${app.config.prefix}: ${app.config.message}`
}
JS apps can fetch data with frameos.fetchText() / frameos.fetchJson(), return text, JSON, SVG
markup, or images, and plug into scenes exactly like the built-in ones. They work on every kind of
frame, and they're the only option on ESP32 and Pico boards.
An app can be more than one file. Its files are its whole module graph: app.ts can
import { layout } from './helper' and import cities from './data.json', and the editor
resolves those siblings as you type. Relative imports only - there is no npm on the frame, so a
bare import x from 'lodash' fails with a message that says so - and stack traces name the file
and line (helper.ts:5:3).
A select field in config.json (and a select state field)
takes either plain strings or { "value": "dark", "label": "Dark theme" } pairs; the value is what
your app sees, the label is what people pick. In the editor's options box that's one value | Label
per line.
Scene JavaScript runs sandboxed: bounded memory and run time, no filesystem, and network access only through the FrameOS fetch helpers.
Nim apps
The built-in apps are written in Nim and compiled into the frame's binary
- this is how a $15 Pi Zero 2 W stays fast. Reading them is the best way to learn what an app can do.
Editing that Nim source is a different matter: it only takes effect in a compiled scene on a Raspberry Pi, and every change means a rebuild. For new work, reach for JavaScript first. A minimal render app looks like this:
import pixie
import options
import frameos/apps
import frameos/types

type
  AppConfig* = object
    inputImage*: Option[Image]
    color*: Color

  App* = ref object of AppRoot
    appConfig*: AppConfig

proc render*(self: App, context: ExecutionContext, image: Image) =
  image.fill(self.appConfig.color)

# called when used as a render app (blue node)
proc run*(self: App, context: ExecutionContext) =
  render(self, context, context.image)

# called when used as a data app (green node)
proc get*(self: App, context: ExecutionContext): Image =
  result = if self.appConfig.inputImage.isSome:
    self.appConfig.inputImage.get()
  elif context.hasImage:
    newImage(context.image.width, context.image.height)
  else:
    newImage(self.frameConfig.renderWidth(), self.frameConfig.renderHeight())
  render(self, context, result)
Things to know:
- The
renderevent is your starting point - it fires on the scene's timer, or when dispatched by another app. - The
contextcarries theimageyou draw on (via pixie) and the scene'sstate, a standard Nim JsonNode: read withstate{"field"}.getStr(), write withstate{"field"} = %*("value"). - State is cleared on every render; use instance variables on the
Appobject to persist data between renders. - Learn by example: the built-in apps, types.nim, and the utils/ folder show what's available.
Where each kind runs
| Raspberry Pi | ESP32-S3 | Pico W / ESP32-C3 | |
|---|---|---|---|
| Built-in apps | All of them | All but Chromium screenshots and RTSP | Rendered on the backend |
| Custom JavaScript apps | ✅ | ✅ | Rendered on the backend |
| Custom Nim apps | Legacy compiled scenes only (self-hosted backend) | ❌ | ❌ |
| Nim code nodes | Legacy compiled scenes only (self-hosted backend) | ❌ - use JS code nodes | ❌ |
SVG, fonts and text
The render/svg app rasterises SVG markup - a very practical way to lay out a panel, especially
from a JavaScript app that generates the markup. <text> elements are typeset with the frame's
own fonts and drawn as outlines, so labels come out sharp at any size - no need to layer
render/text on top of an SVG for its labels. font-family is matched loosely against
the fonts on the frame - "PT Sans", PTSans-Bold.ttf and font-weight="bold" all land on
PTSans-Bold.ttf - and anything the frame doesn't have falls back to the built-in face rather than
failing the drawing. text-anchor, dominant-baseline, <tspan>, entities and stroked or
transformed text all work. FrameOS implements a subset of SVG rather than the whole spec: <defs>
and external references are ignored, a Pi holds at most eight typefaces per SVG, and on a
microcontroller SVG text always renders in the one built-in typeface.
On a Raspberry Pi you can upload your own TrueType fonts under the frame's assets and pick them in
any text or font field. Drop a NotoColorEmoji.ttf in there and it's used automatically as a
fallback for characters your font doesn't cover (SVG text excluded - color emoji are bitmaps with
no outlines). An ESP32 with an SD card can load TTFs from fonts/ on the
card too, one face at a time.
The scene store
Browse, preview, fork and install community scenes from scenes.frameos.net - on cloud-managed frames with one click, or on a self-hosted backend by pasting a link.
Big images on small devices
How FrameOS renders a 12-megapixel photo on a device with 8 MB of RAM - streaming decoders, bounded decodes, spooling and caching.