
 FrameOS
Editing scenes
Build scenes visually with the node-based editor - events, apps, data sources and state.
A scene is what a frame shows: a graph of connected nodes that runs on the device. Scenes are built in a visual editor, then deployed onto the frame, where it runs.
Self-hosted backend, FrameOS Cloud and standalone frames
The same editor ships in the self-hosted backend, in FrameOS Cloud, and on a standalone frame's own admin page. Everything here works in all three, except compiled scenes, which need the self-hosted backend.
Create a scene
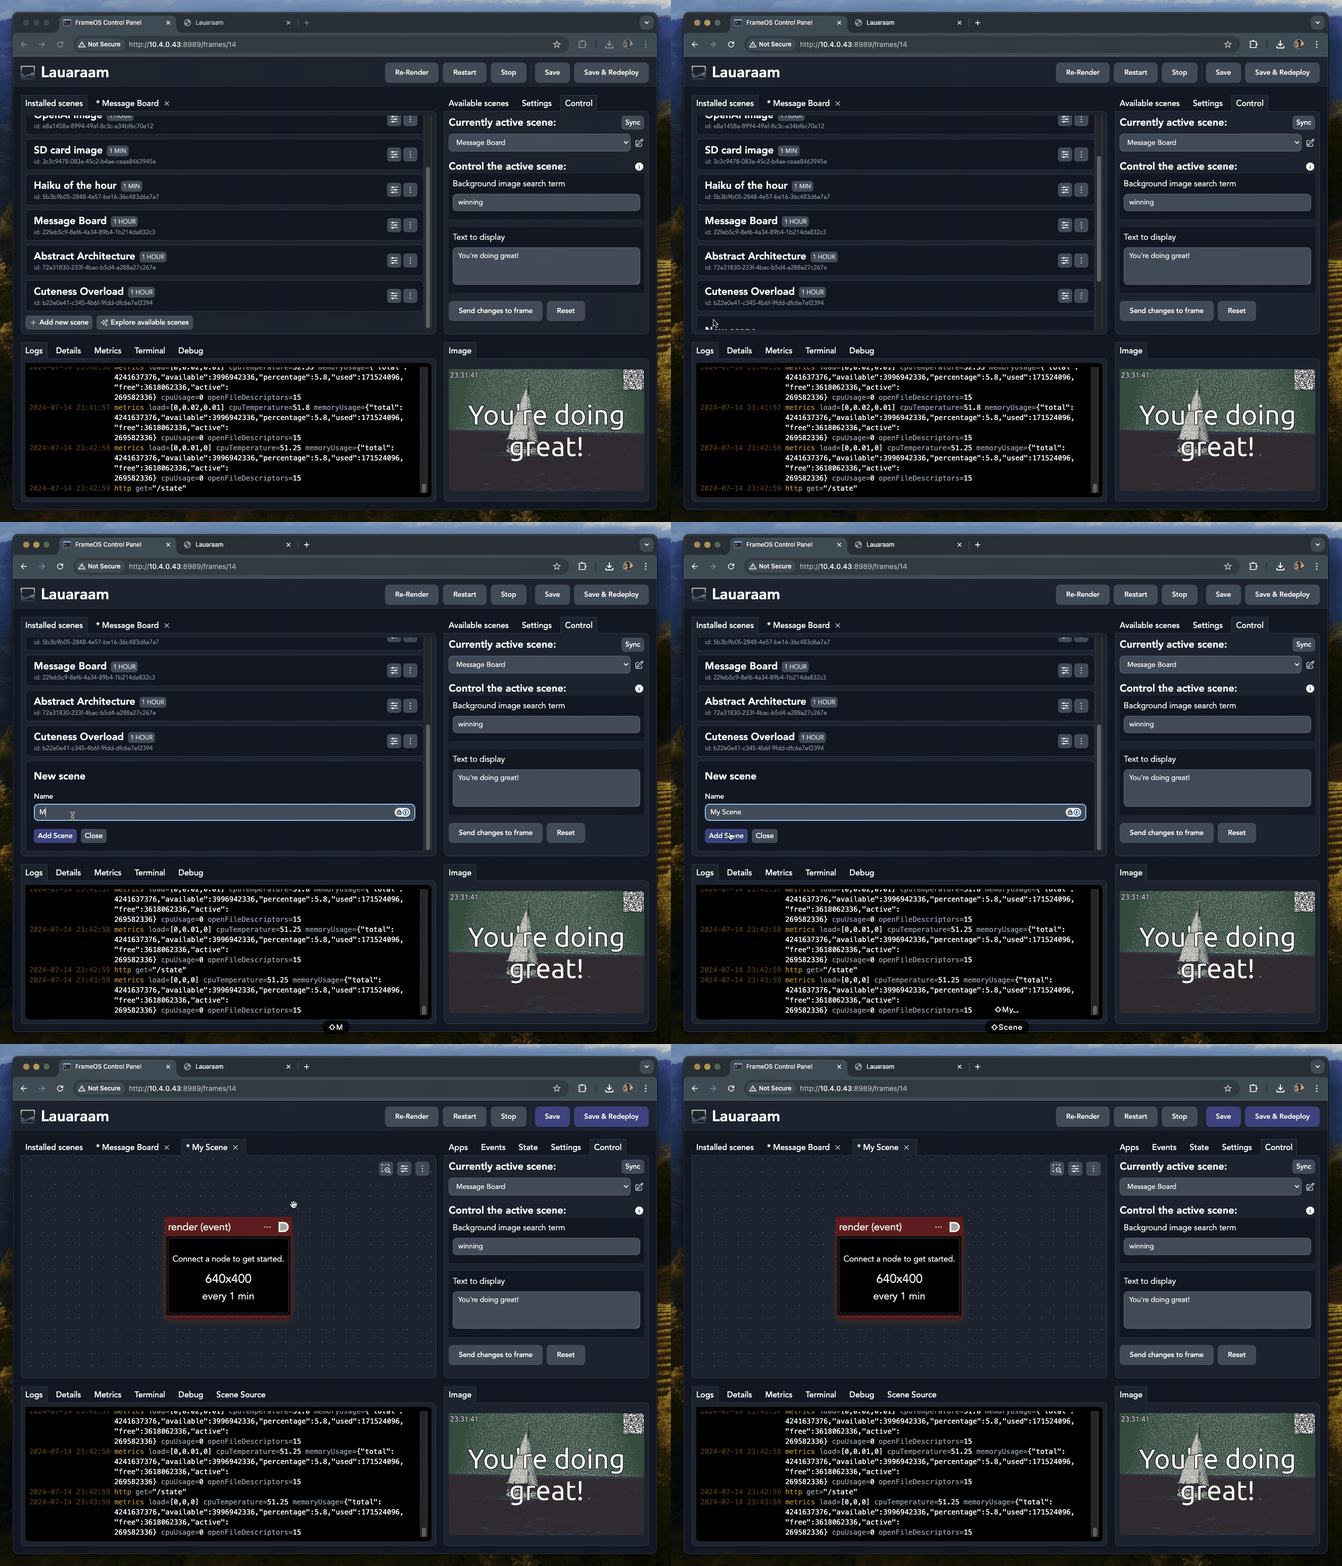
Click + Add new scene, give it a name, and open the editor.
The four node colors
- 🟥 Red - events. Entry points that trigger execution. The most important one is
render, which fires at a set interval (every 60 seconds, every hour, whatever you choose). Others react to buttons, touch and keyboards, schedules, or custom events. - 🟦 Blue - render apps. Draw things: images, text, calendars, gradients, split layouts.
- 🟩 Green - data apps. Fetch and transform data: download an image, query Home Assistant, parse an iCal feed, generate an image with OpenAI, take a screenshot of a web page.
- 🟨 Yellow - state fields. User-editable values (text, numbers, options) that can be changed live from the control page without redeploying.
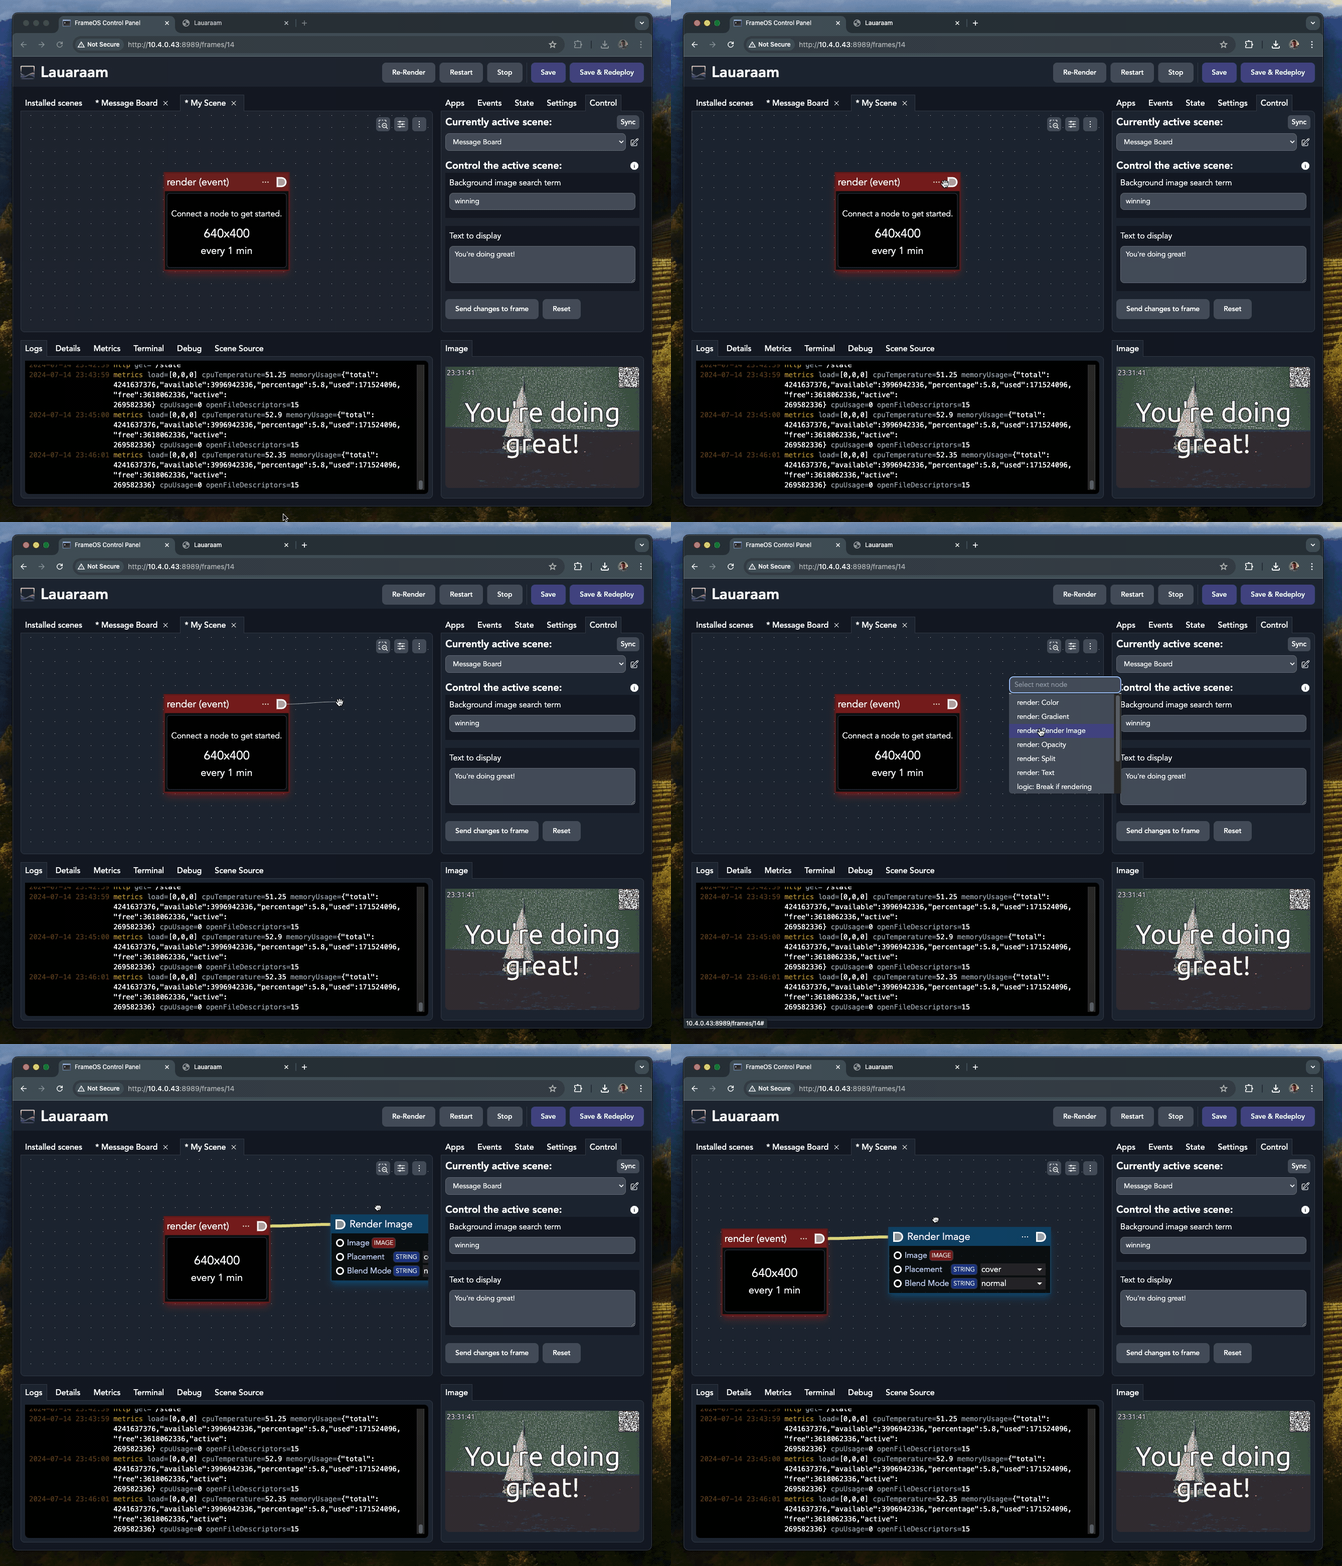
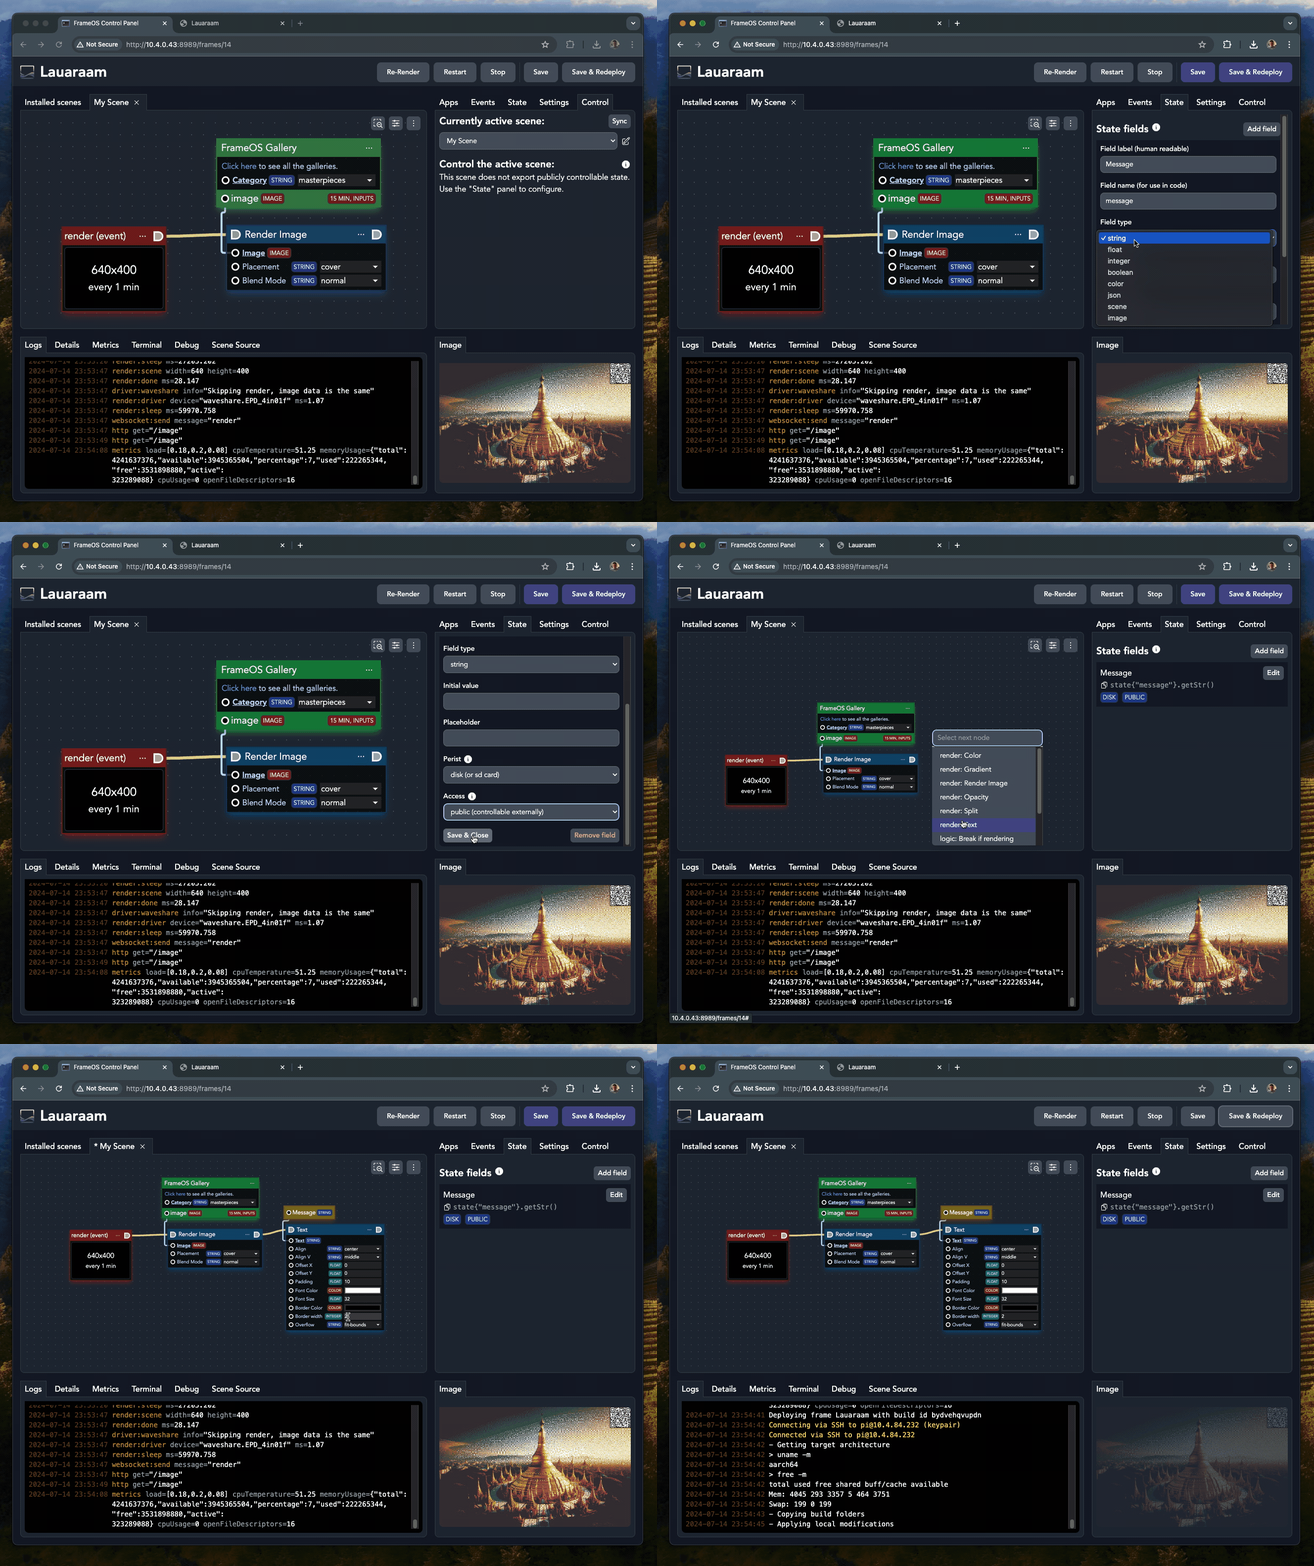
Drag from the render event's connector to add a blue Render image app:
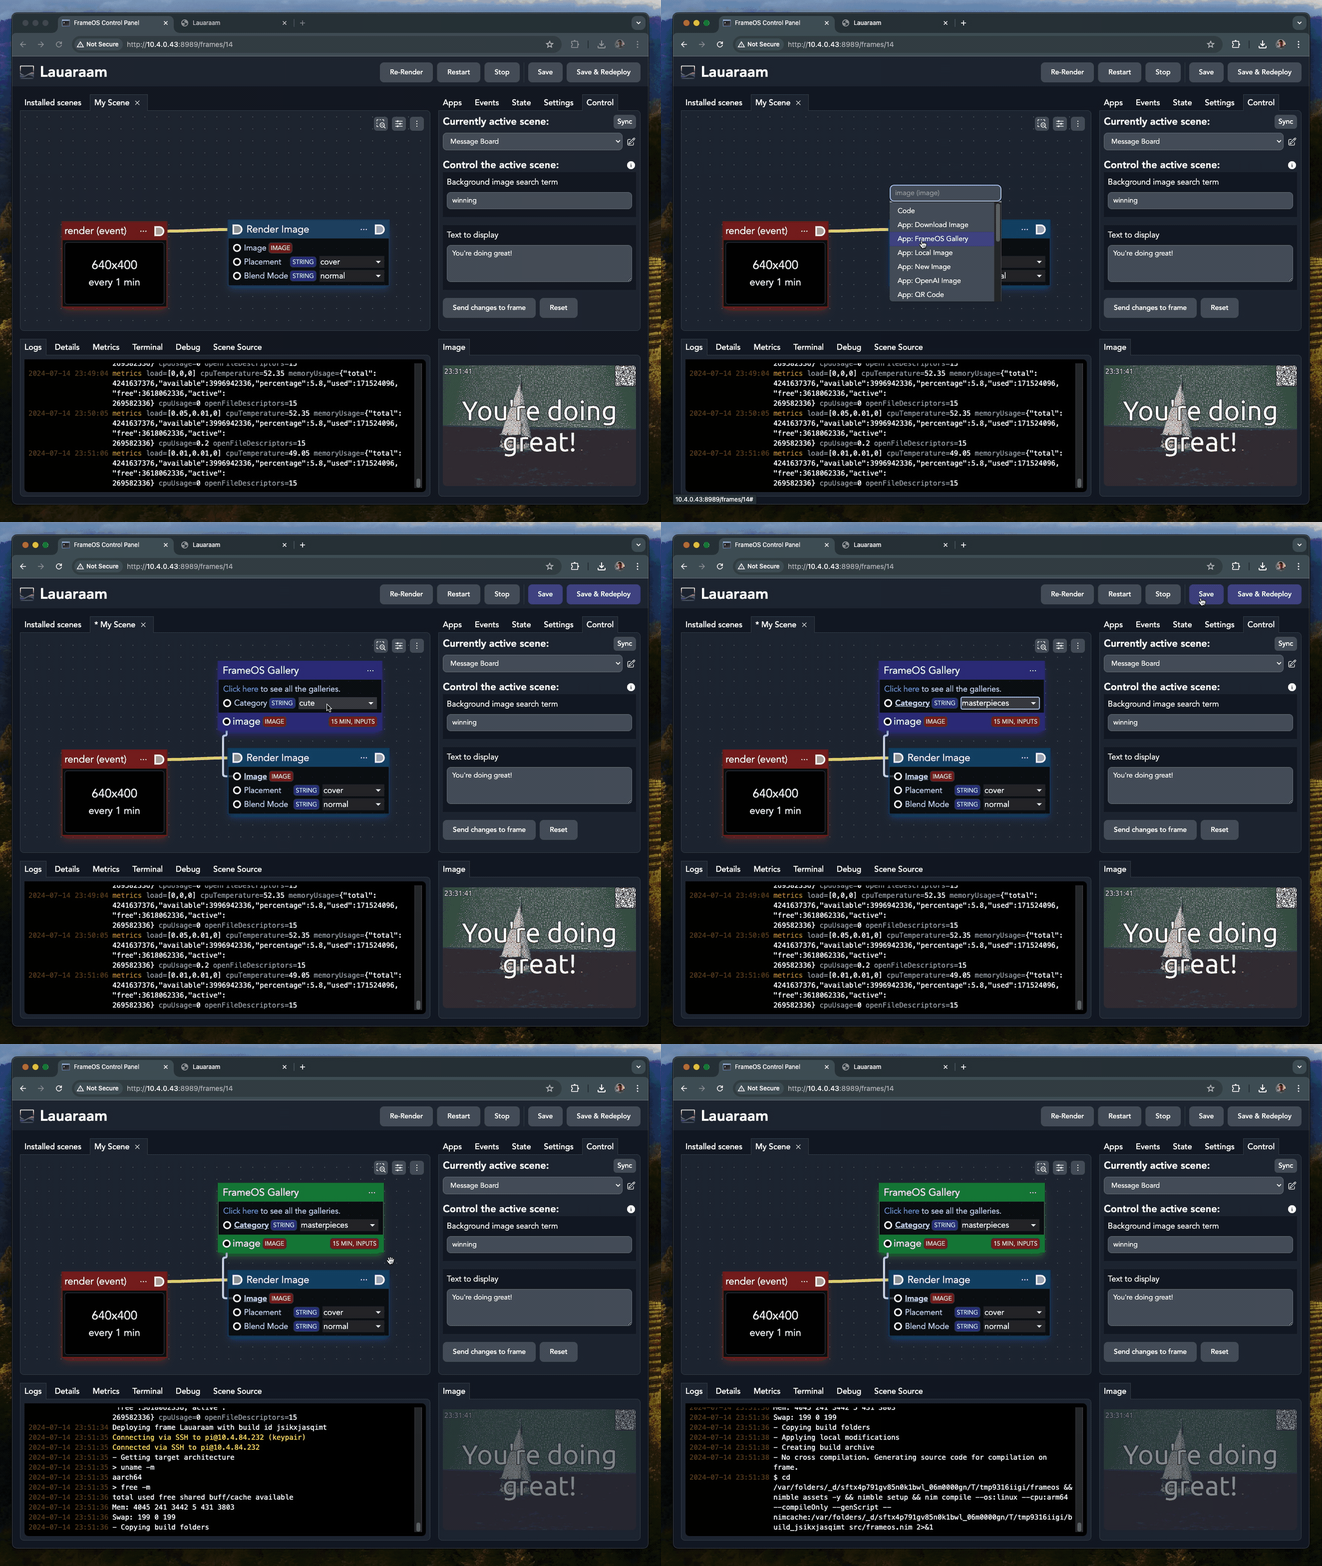
Then drag its image field out and pick a green data app to feed it - use FrameOS Gallery if unsure. Press deploy:
Caching
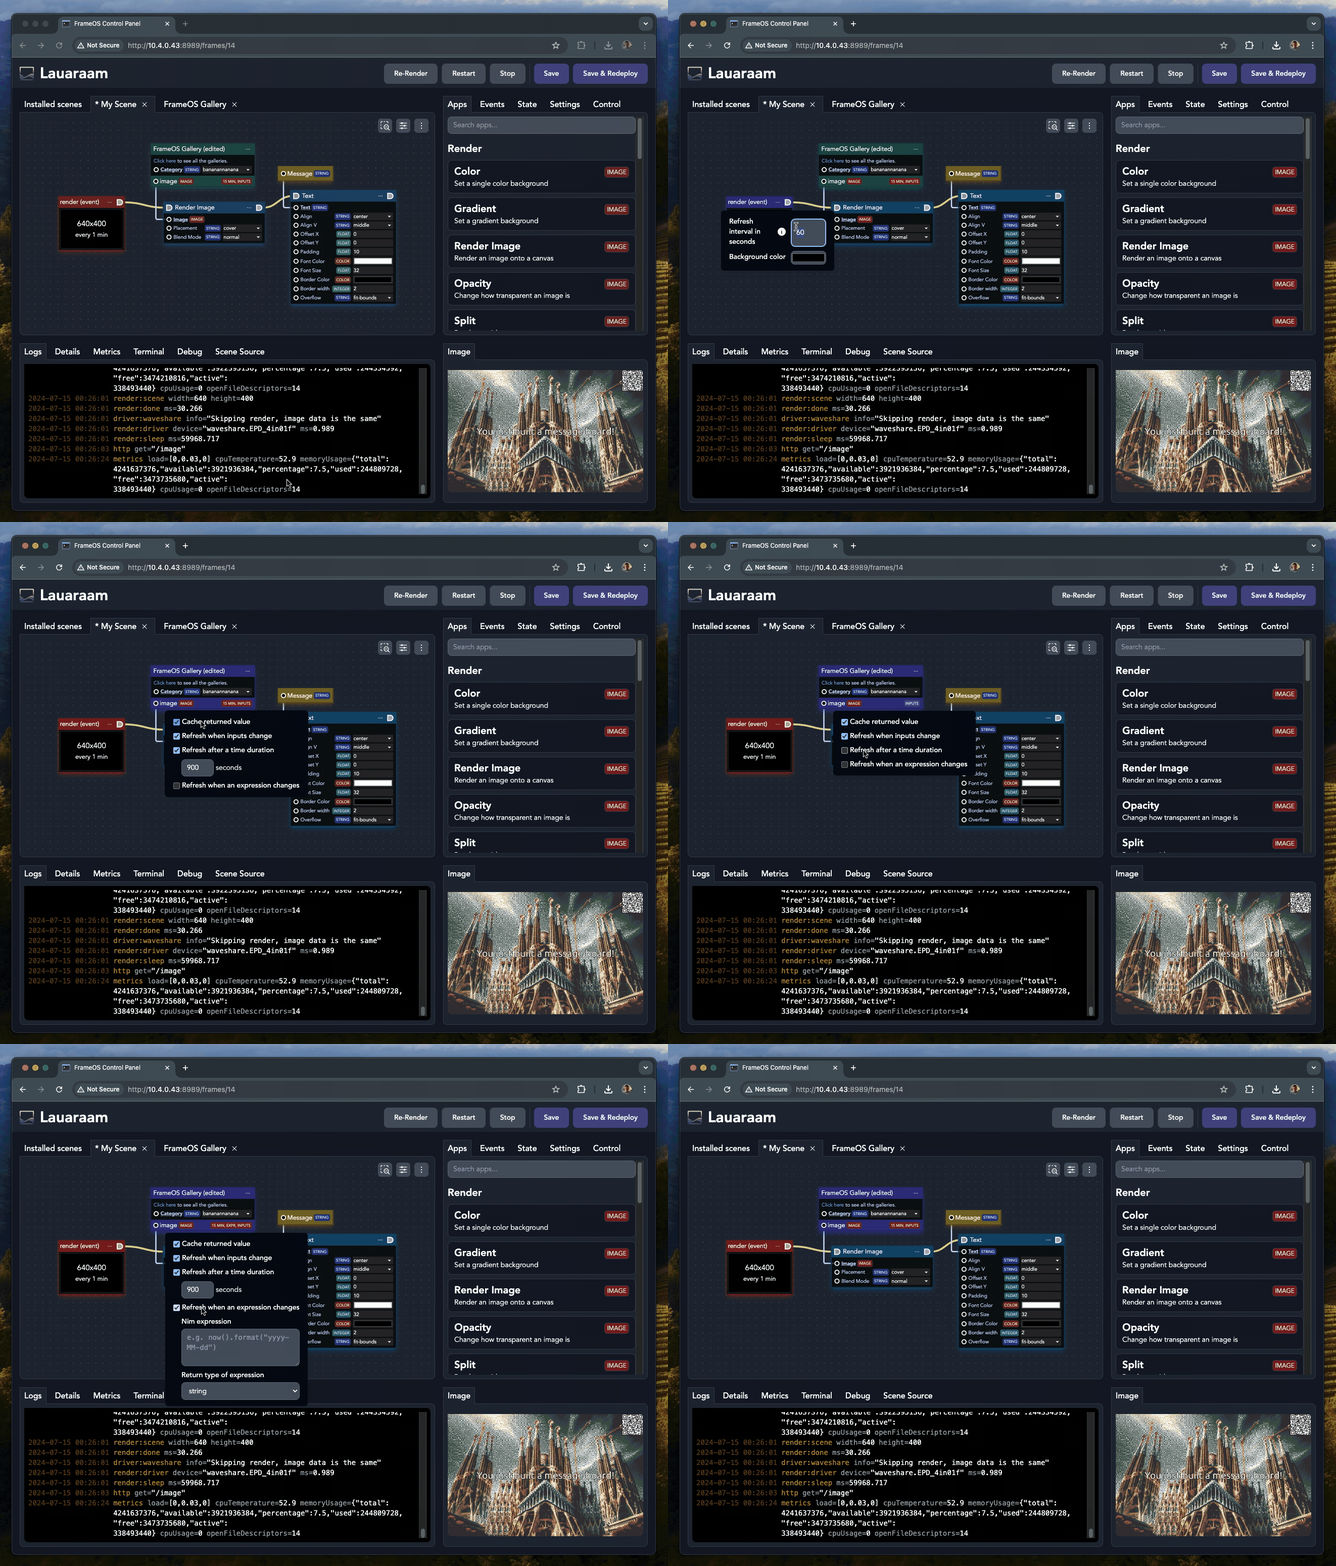
Every data app has cache controls. A scene might re-render every minute while its data app only fetches a new image every 15 minutes - the cached value is reused in between. And if a re-render produces the same image as before, an e-ink display won't refresh at all: no unnecessary flashing.
State fields
Add a yellow state field under the scene's "State" tab, then drag it onto the canvas and wire it into any app input. Deploy once, and from then on you can change the value live - from the frame's control page, the backend, or the HTTP API.
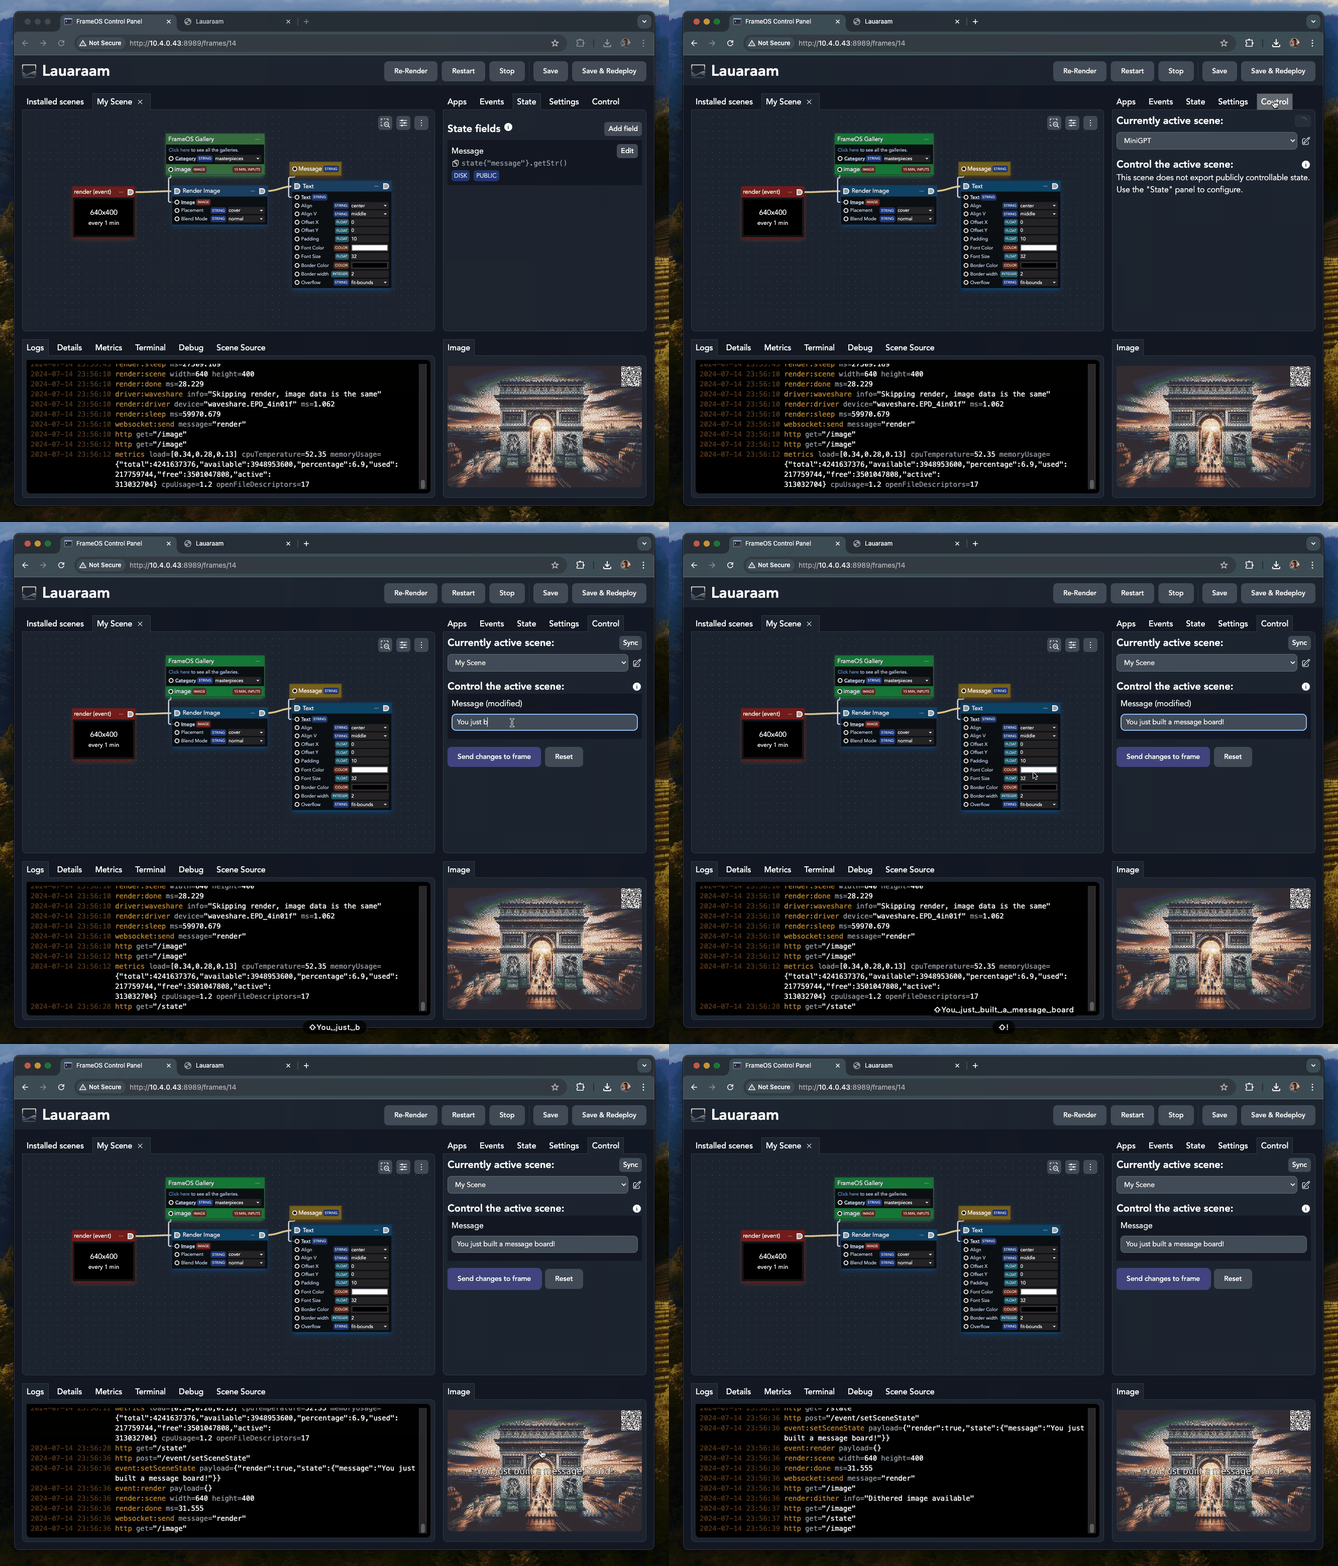
Fields are typed, and the type decides what the control page shows: text, long text, numbers,
booleans, a color picker, a date picker, a select box, raw JSON, a font picker, an image, a
scene picker - or a path, which is a file and folder browser over the frame's own
assets. "Which photo folder should this play?" becomes a picker instead
of a typed-in string. A select's options are one per line, either a plain value or value | Label
when what the frame stores and what people read should differ. Write a literal pipe as \|.
Every scene also has one field you don't add yourself: Refresh interval (seconds), listed last
wherever the scene's fields show up - the control page, the backend, the cloud, schedules and
previews (FrameOS 2026.9.20+). It starts at the interval from the scene's settings; change it like
any other field and the next sleep follows. To decide where it sits, what it's called, or to hide
it (access: private), add your own numeric field and switch on Use as refresh interval. In
code it is state.refreshInterval. The Next sleep duration app is still a one-time override:
it sets how long to sleep after this render, and the render after that is back on the interval.
Scenes inside scenes
A split (or any scene node) draws other scenes into cells, and each of them renders on its own schedule (FrameOS 2026.10.17+): a clock that ticks every second next to a photo that changes every hour re-runs only the clock, and the photo's cell puts back what it drew last time. The split's own interval is the fastest it renders, so set it to the quick cell's pace; each cell's options say when that cell renders. A render asked for from outside - a button, the API, the schedule - redraws every cell.
Buttons, touch and keyboards
A frame's GPIO buttons reach a scene as two events (FrameOS 2026.10.16+):
button- what the person meant:press,doublePress, orlongPress(held a second or more, delivered once, on release). Every press is exactly one of the three, so abuttonlistener without an action filter never runs twice for one press. Apressarrives 350 ms after the release, once it's clear no second tap is coming.gpio- what the line did:downandup, the moment they happen. Listen for these to count every tap, or for hold-to-show.
Each edge is timestamped when the frame sees it, so a tap made while an e-ink panel spends 30 seconds refreshing is still a tap, and two of them are still a double press. In the event node, the label and pin filters pick from the frame's own buttons.
On a Pi with a touchscreen, a mouse or a keyboard (FrameOS 2026.10.0+), scenes also hear
pointerDown, pointerMove and pointerUp (one pointer per finger), wheel, keyDown and
keyUp with the key in the frame's keyboard layout, textInput, and the gestures tap,
doubleTap, longPress and swipe - all in the scene's own pixels, rotated frames included.
The older mouseMove / mouseDown / mouseUp names keep working. The Touch test and
Keyboard test sample scenes show every event as it arrives. The browser preview sends the same
events from your mouse and keyboard, and a preview button you hold down is held like a frame's key.
Code nodes
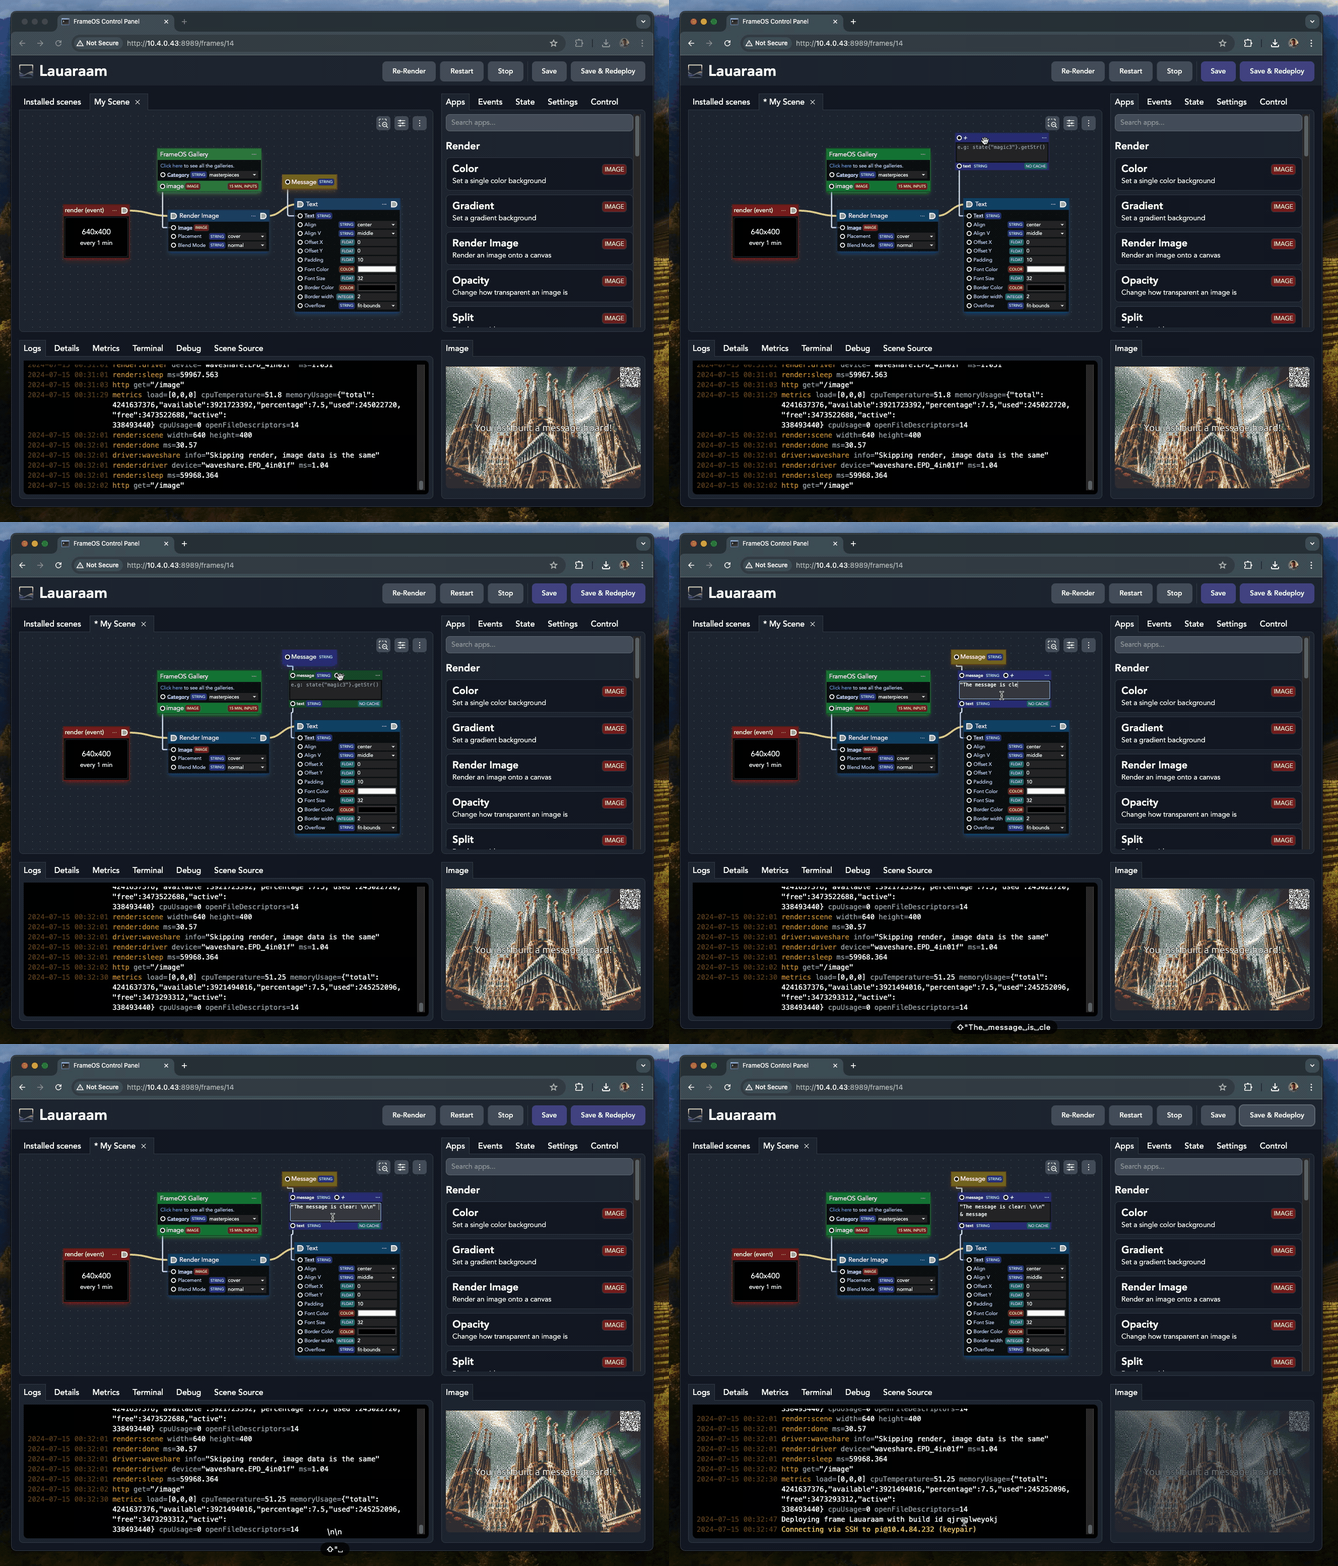
For quick data plumbing there are inline code nodes (green when not selected): single JavaScript or TypeScript expressions that combine or transform values mid-graph - string concatenation, math, formatting. (A legacy compiled scene may still carry Nim expressions; those nodes show a "Legacy Nim" chip with a Convert scene button.)
How scenes run
Scenes are interpreted: the frame runs the graph as you drew it. New scenes are created that way, every scene FrameOS ships is built that way, and it's the only way ESP32 and Pico frames can work at all. What you get:
- Deploys are near-instant - nothing is recompiled, so a change is on the frame in seconds.
- Code nodes are JavaScript, TypeScript or JSX, and apps can be customised in JavaScript.
- It costs a little more per render, which matters very little on a display that takes 20 seconds to refresh anyway.
There is a second, older mode - compiled - which turns the scene into native code inside the frame's binary. It is a legacy path: it's the only mode that can run custom Nim app source and Nim code nodes, but it forces a FrameOS source build on every deploy, and it only works on a Raspberry Pi deployed from a self-hosted backend. The cloud refuses compiled scenes outright, at upload and at install. Nothing in the editor creates one any more: new code nodes are always JavaScript, and saving or installing a Nim-only app asks before it flips a scene to compiled. Compiled scenes wear an amber legacy compiled tag - on the frame list, in the deploy drawer and in the scene sidebar.
The way out is the converter: Convert to an interpreted scene, in the scene's menu, in Scene
Settings and on any "Legacy Nim" node. It ports Nim code nodes and scene-local Nim apps to
JavaScript - simple expressions convert deterministically, the rest goes through an AI pass, and
whatever can't be ported is reported as needing a manual port. It converts the editor's unsaved
copy in place, so check the result, then save or deploy. The Nim does not survive the conversion -
export the scene first if you want a backup. A backend forwards the conversion to the cloud, using
your OpenAI key from Settings → OpenAI when one is set. The same converter is a public page at
scenes.frameos.net/nim-converter (paste scene JSON, no
login) and a scene_convert MCP tool.
Compiled scenes are the explicit exception
A scene is interpreted unless it says otherwise: templates, imports, backups and AI-built scenes that carry no execution mode all run interpreted. A scene that carries Nim without saying it is compiled stays interpreted too, and Scene Settings flags the Nim it can't run. The Execution select and the frame's Installation mode live under an Advanced disclosure on a Pi frame. Build new scenes interpreted unless you specifically need Nim. If you switch an existing scene between modes, do a full deploy afterwards; the editor warns you when a scene still contains Nim source that interpreted mode can't run.
On the frame side there are two ways a binary gets built: precompiled (the release binary plus
its driver libraries, scenes interpreted - the default) and static (everything compiled into
one binary, which is what a compiled scene forces). Frames still configured with the retired
shared or shared-scenes modes are moved to static automatically.
Push, activate, preview
A frame's scene drawer has three buttons. The main one puts the scene on the frame as it stands, saved or not: Push & activate (or Push to frame on the scene that's already active) while the frame doesn't have your latest edits, plain Activate (or Apply) once it does. It pushes only that scene and the scenes it draws or switches to - settings and your other unsaved edits stay where they are. Preview runs the scene in your browser with the values in the drawer, and Reset puts them back. Scenes are pushed; settings and FrameOS itself are deployed.
Two ways to see a scene without committing to it:
- Preview in browser runs the scene in your browser. The frame's renderer is compiled to WebAssembly, so you get the real thing - same apps, same layout engine, same resolution - without deploying to a device, or before you own one. It comes with a Browser assets folder that lives only in your browser (seeded with sample photos, so slideshow and SD-card scenes render), JavaScript clocks in the frame's time zone, and a real-time toggle for scenes that want to run faster than one frame a second.
- Preview on frame temporarily shows the scene on the actual frame without saving or deploying it. Good for checking how a color dithers on real e-ink. A sleeping ESP32 gets it on its next wake.
How to learn
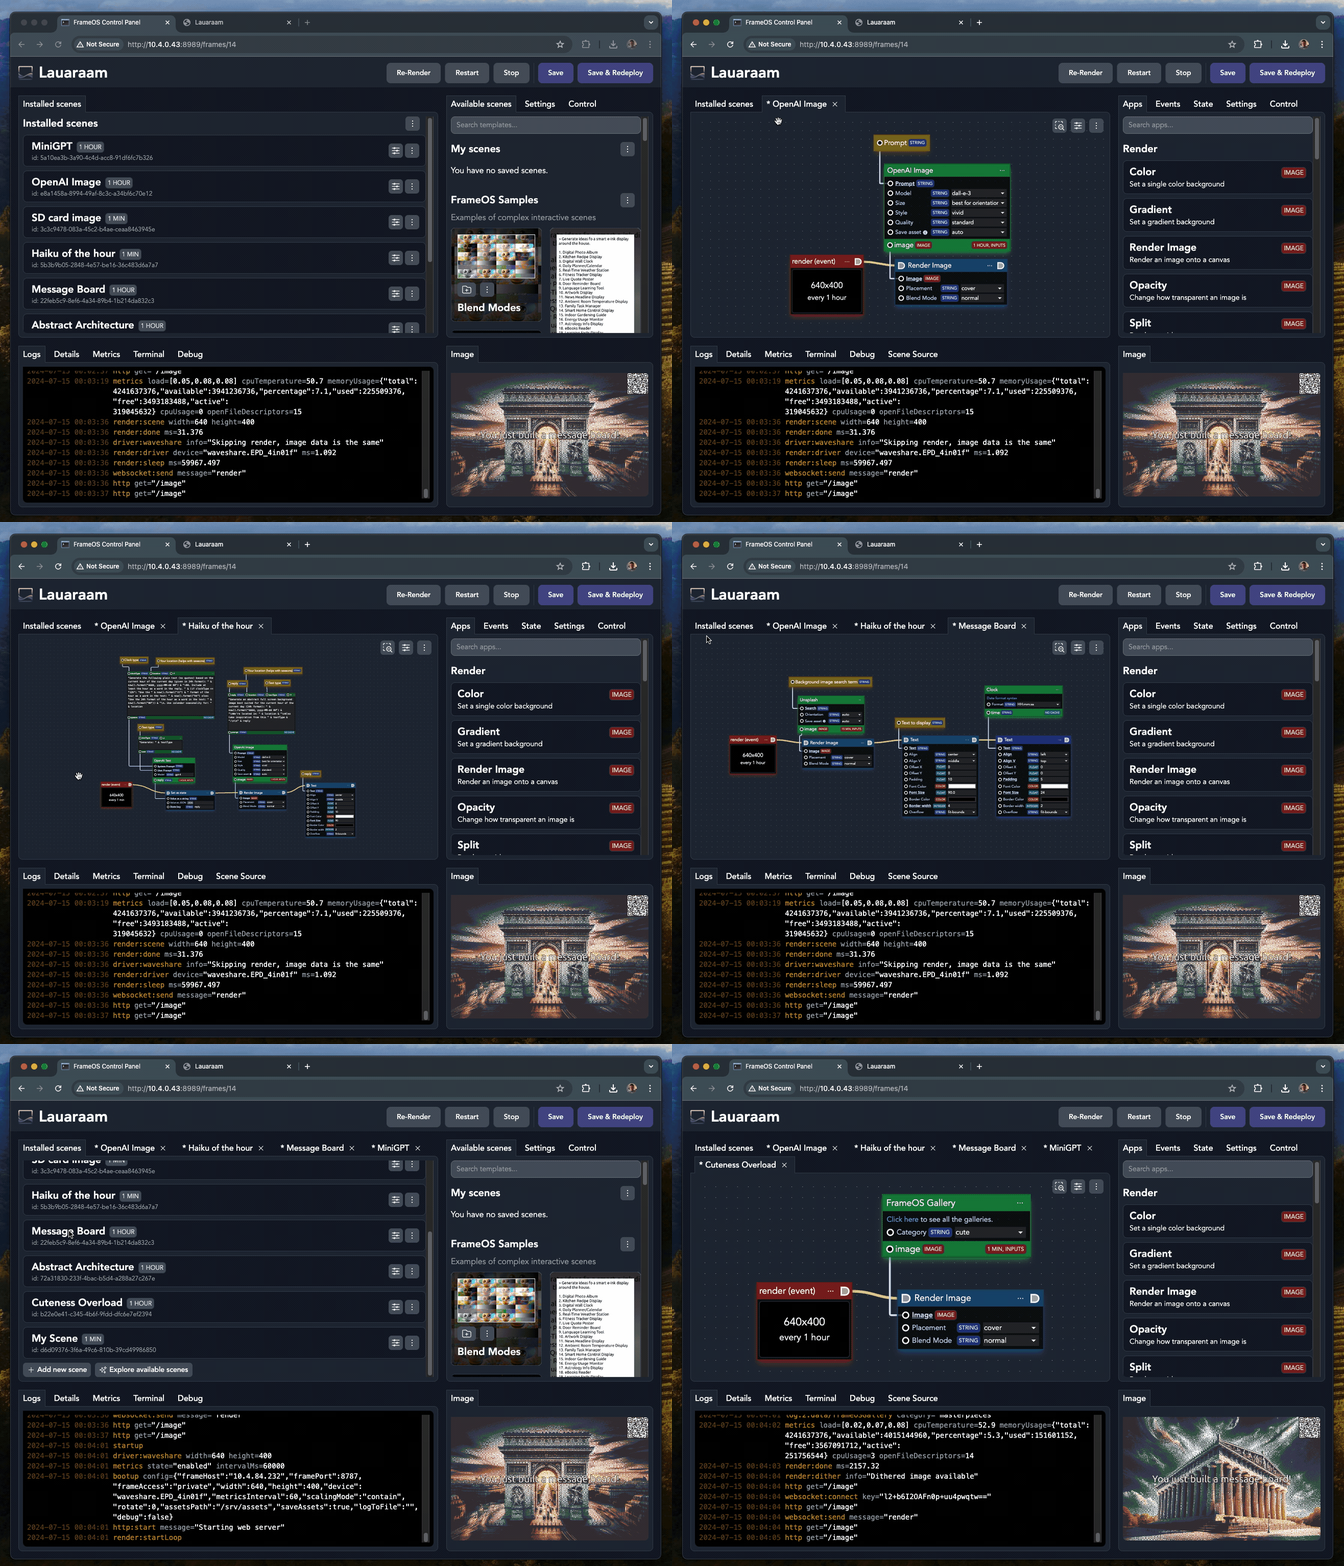
FrameOS ships with many sample scenes. The fastest way to learn is to install them, open them in the editor, and poke around.
With an AI assistant on your backend or in the cloud, you can also describe a scene - or a change to one - in the editor's chat drawer, and it builds or edits the graph, renders it to check, and hands it to the editor unsaved.
When the visual editor isn't enough, write your own apps - in Nim or JavaScript. Editing apps is next.